![]()
NOTICE: this option is only available for exchanges that support the polygon network. If your exchange is not listed below, please refer to the advanced ways below and follow steps 1 to 4.
- Binance
- Crypto.com
- Gate.io
- Kucoin
- Buy the amount of MATIC you want on your exchange
- Follow "Step 2: Connect Metamask to Polygon Main Net" and select that network in your wallet"
- Switch your wallet to the polygon network.
- Withdraw your MATIC to you wallet. Make sure that the network selected in the withdrawal screen is "polygon". If you dont see this option, please refer to the advanced guide
- Go to "Step 4: MINT!"
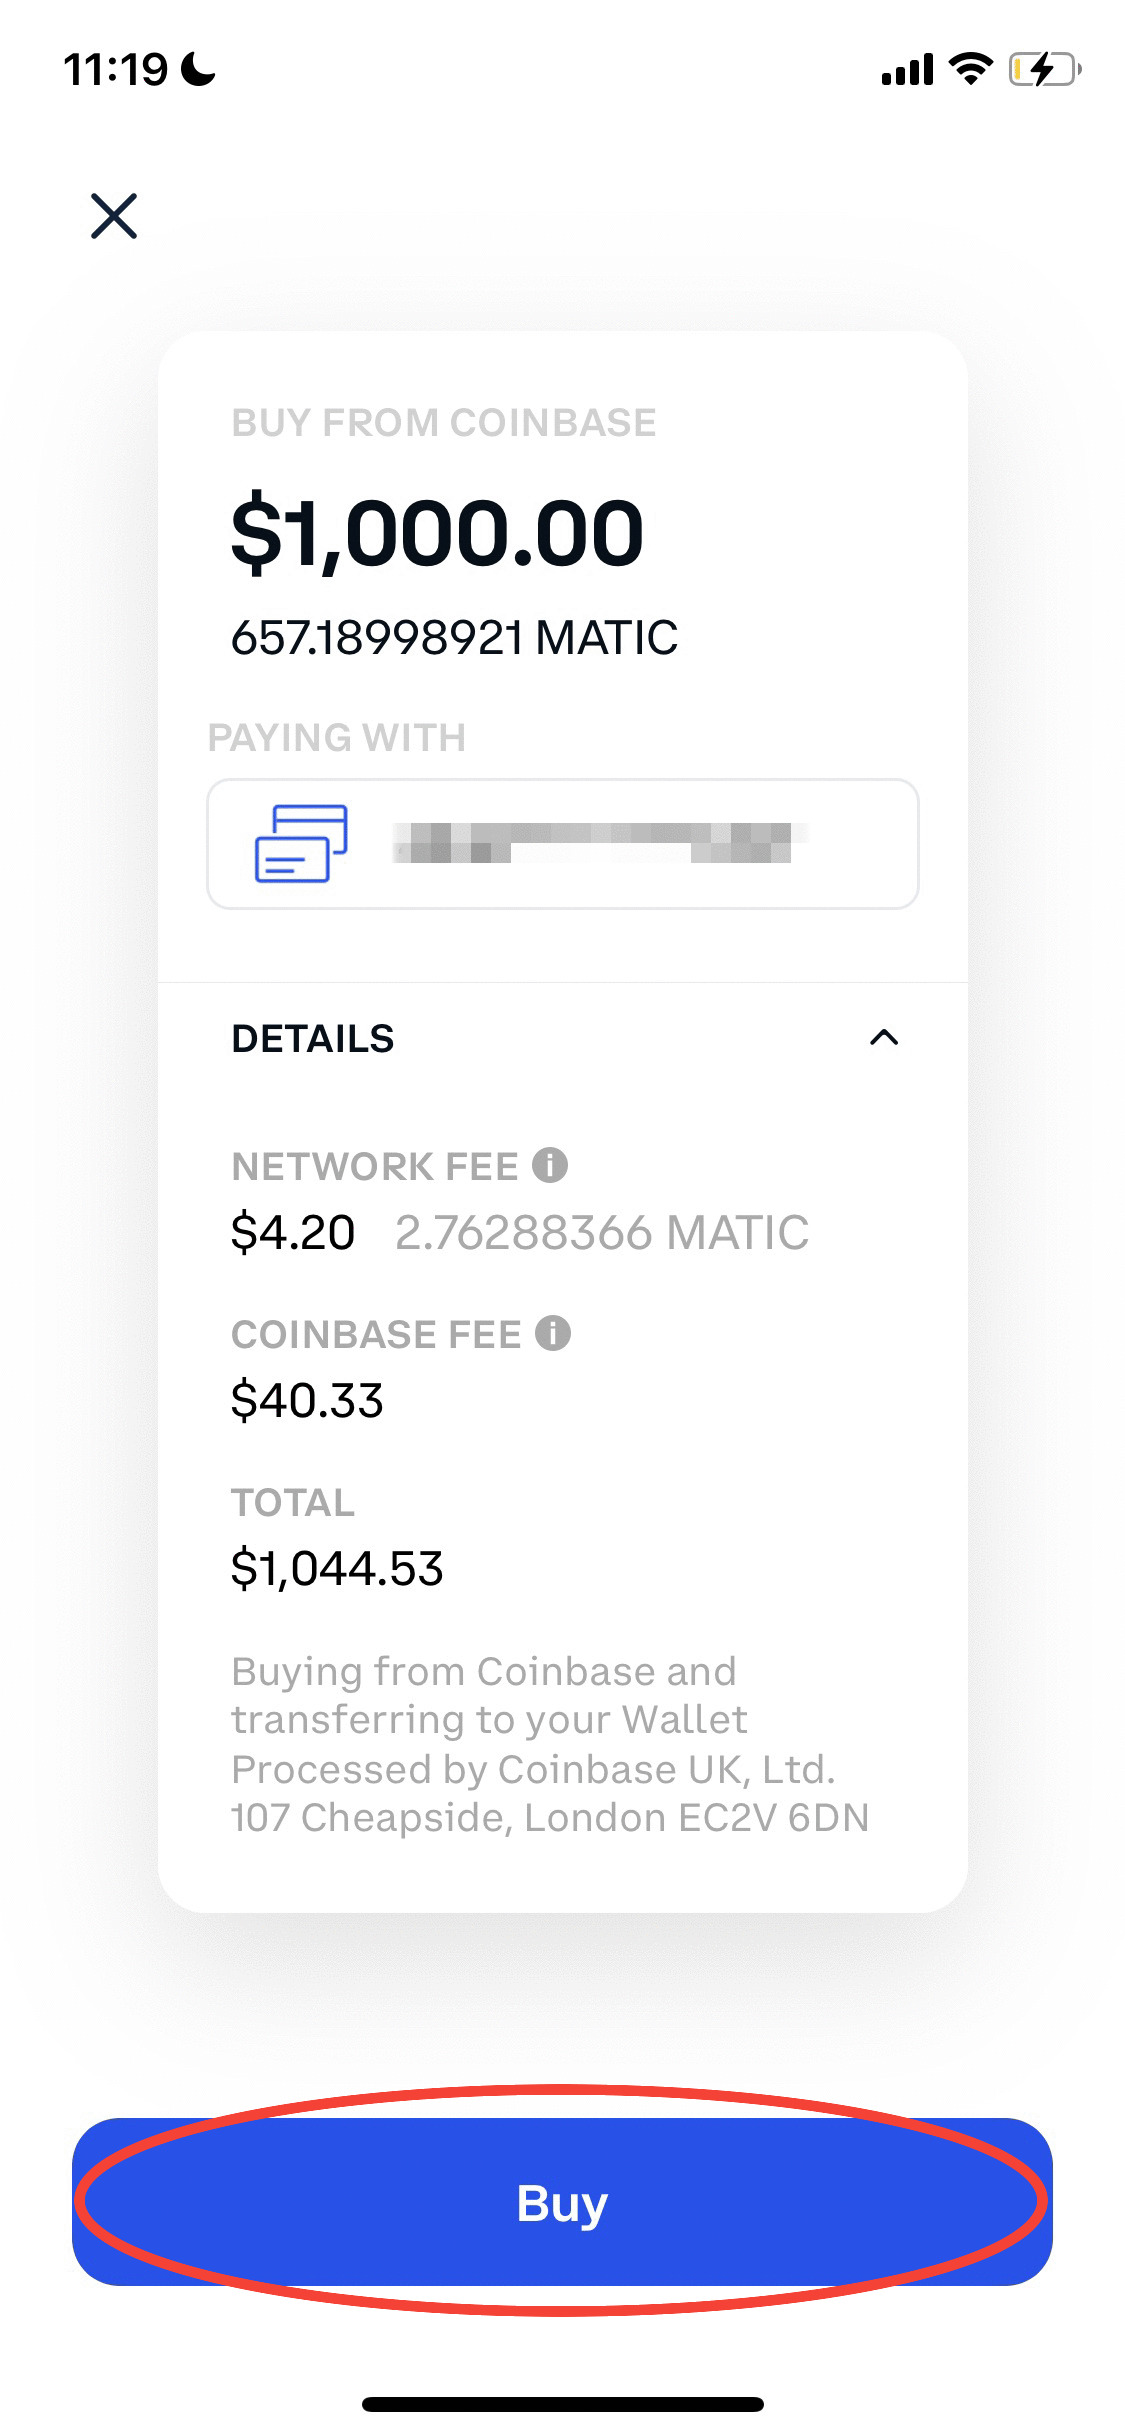
*Don’t forget to purchase a little bit extra to cover transfer fees*
Option 1:
- Make sure your wallet is connected to the ETH main net for this step (This is the default when you make a new wallet)
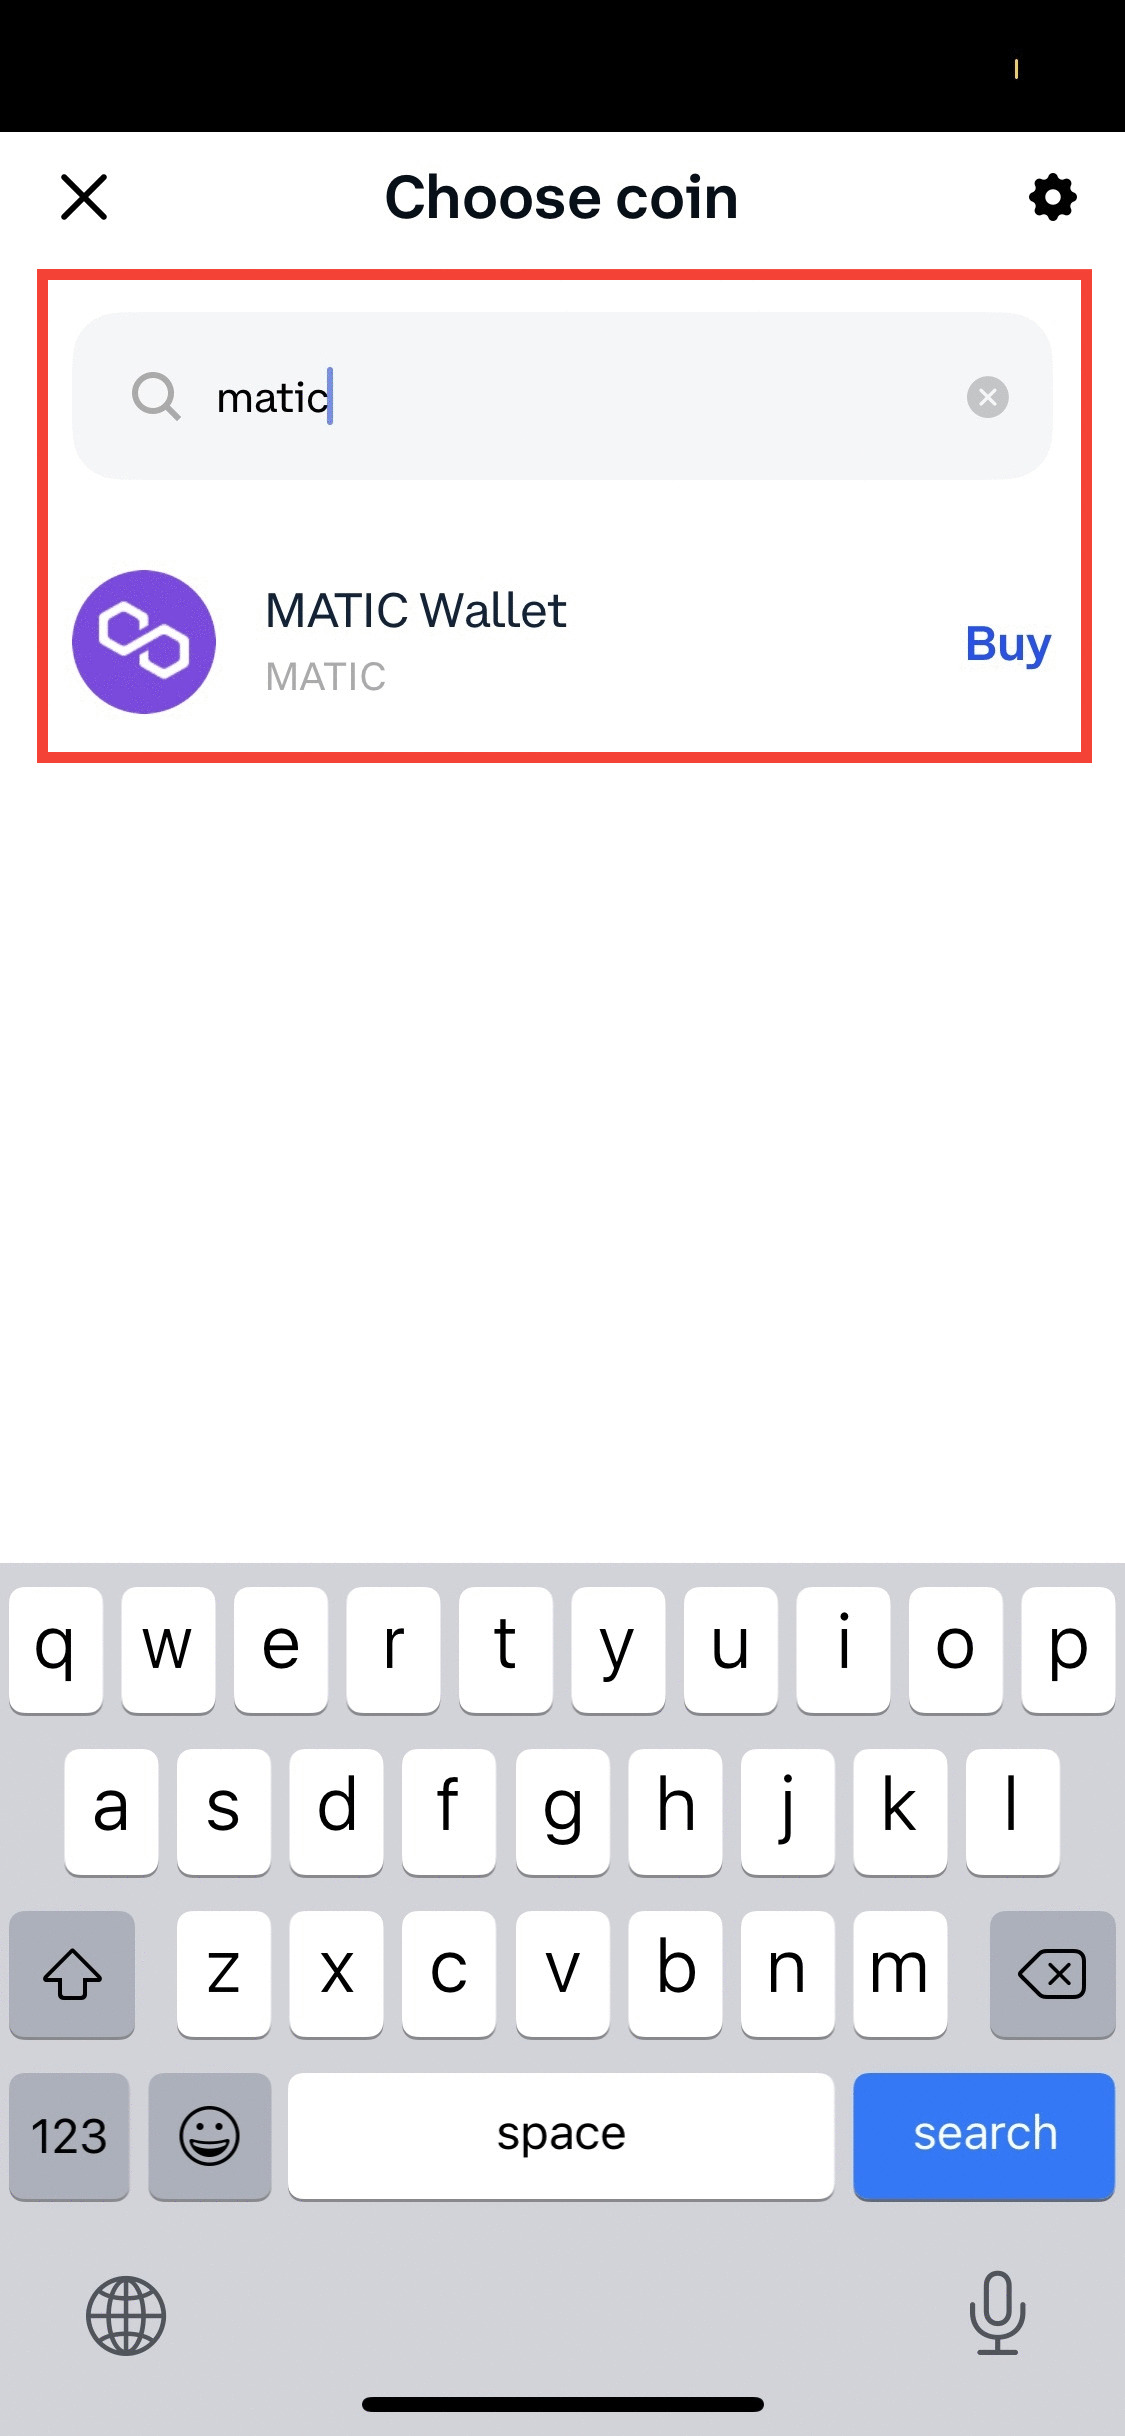
- Choose MATIC (wallet tab, under coins)
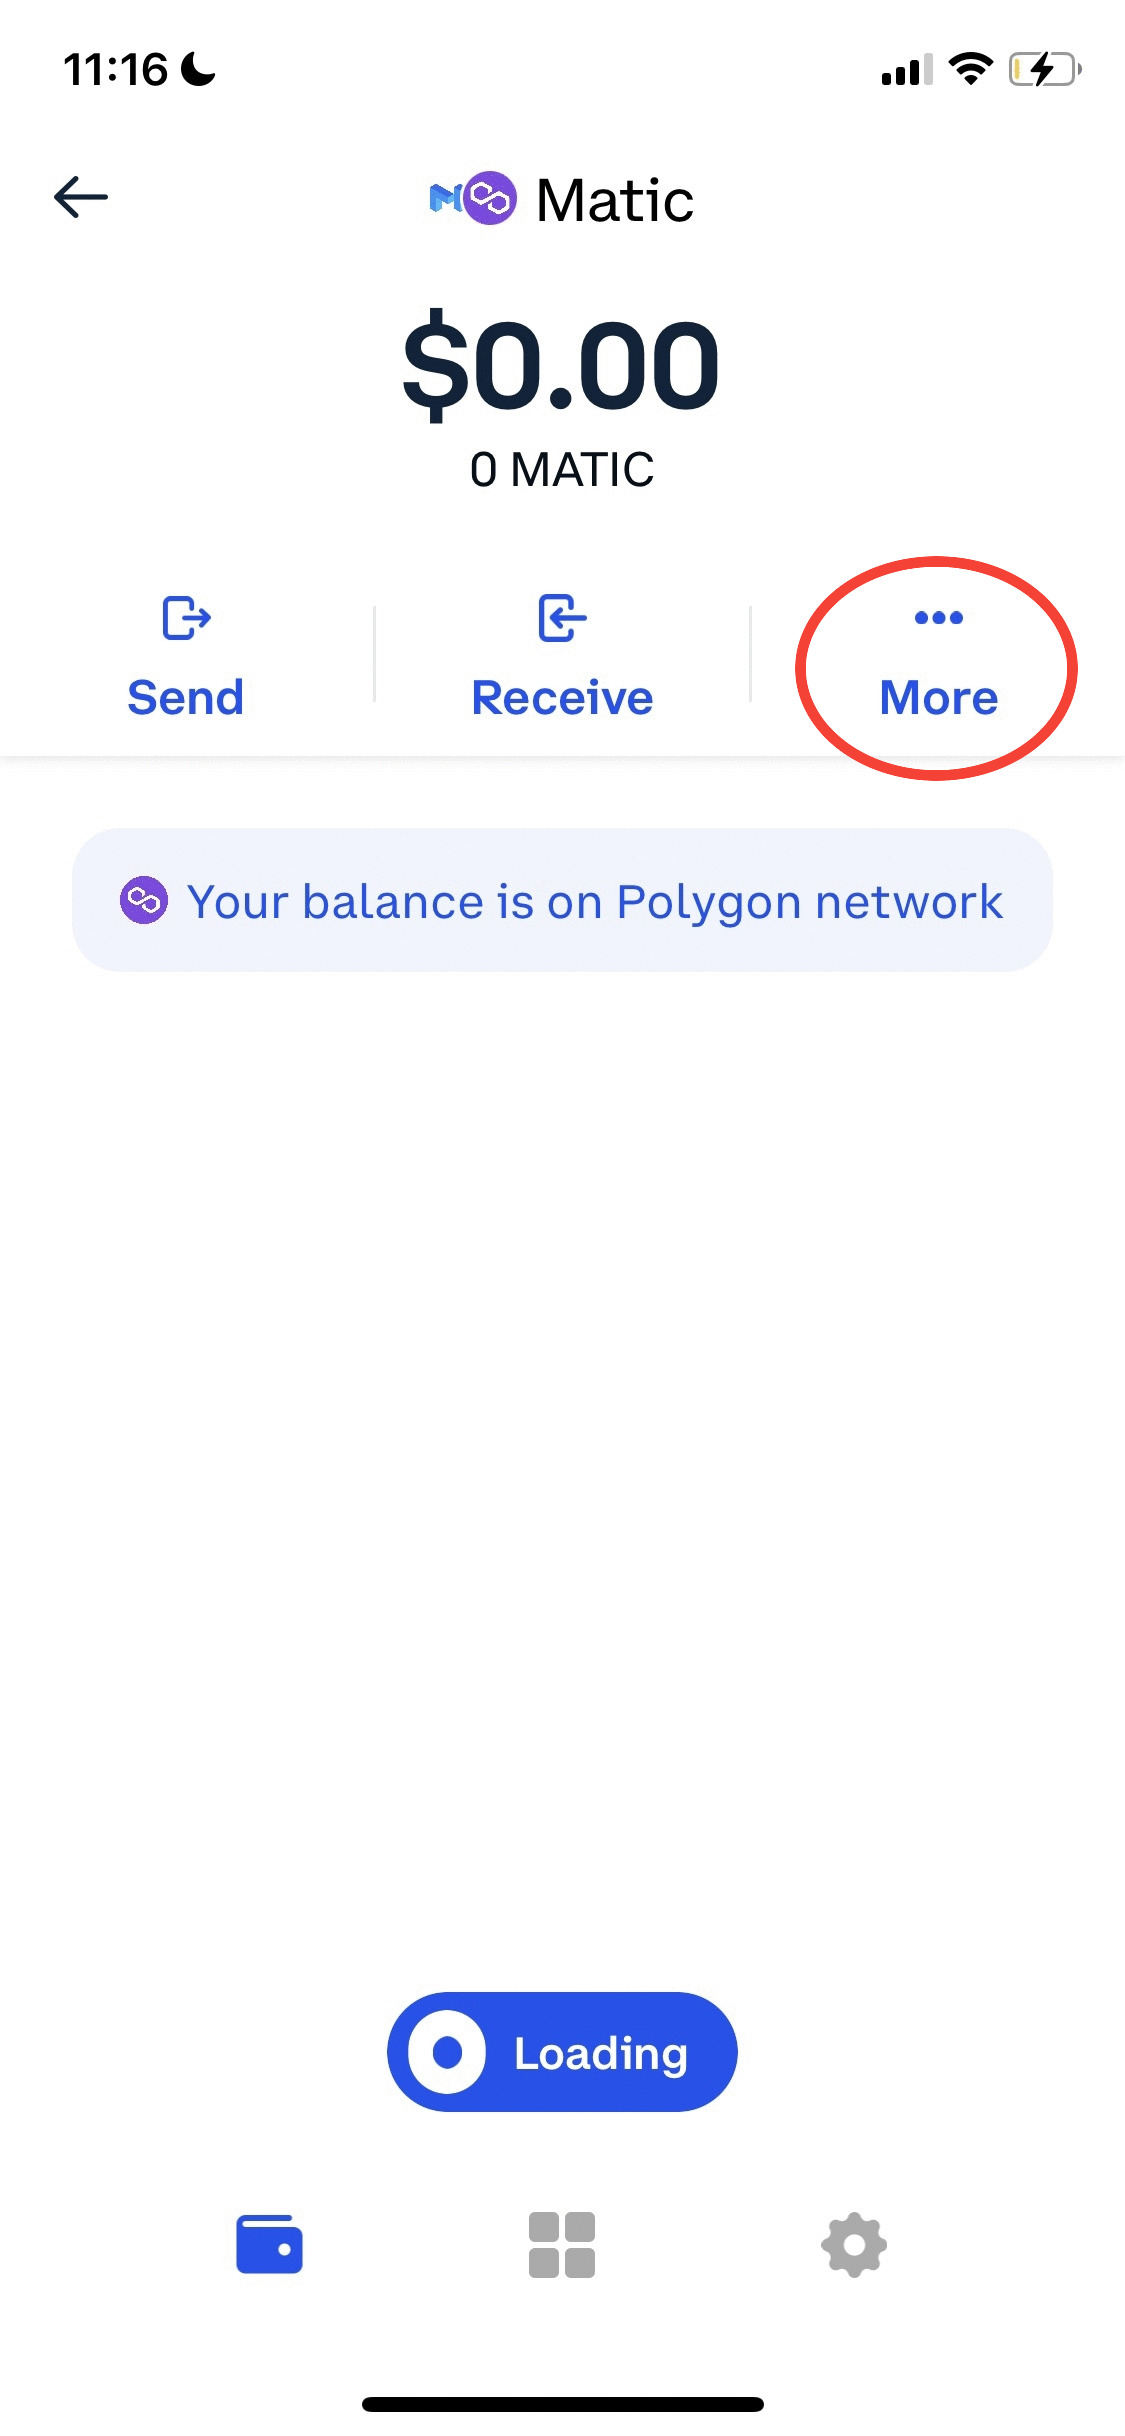
- Purchase in increments of NFT price to match amount of NFTs you’d like to purchase
- Follow steps 1 to 4 bellow!
*Don’t forget to purchase a little bit extra to cover transfer fees*
Option 2:
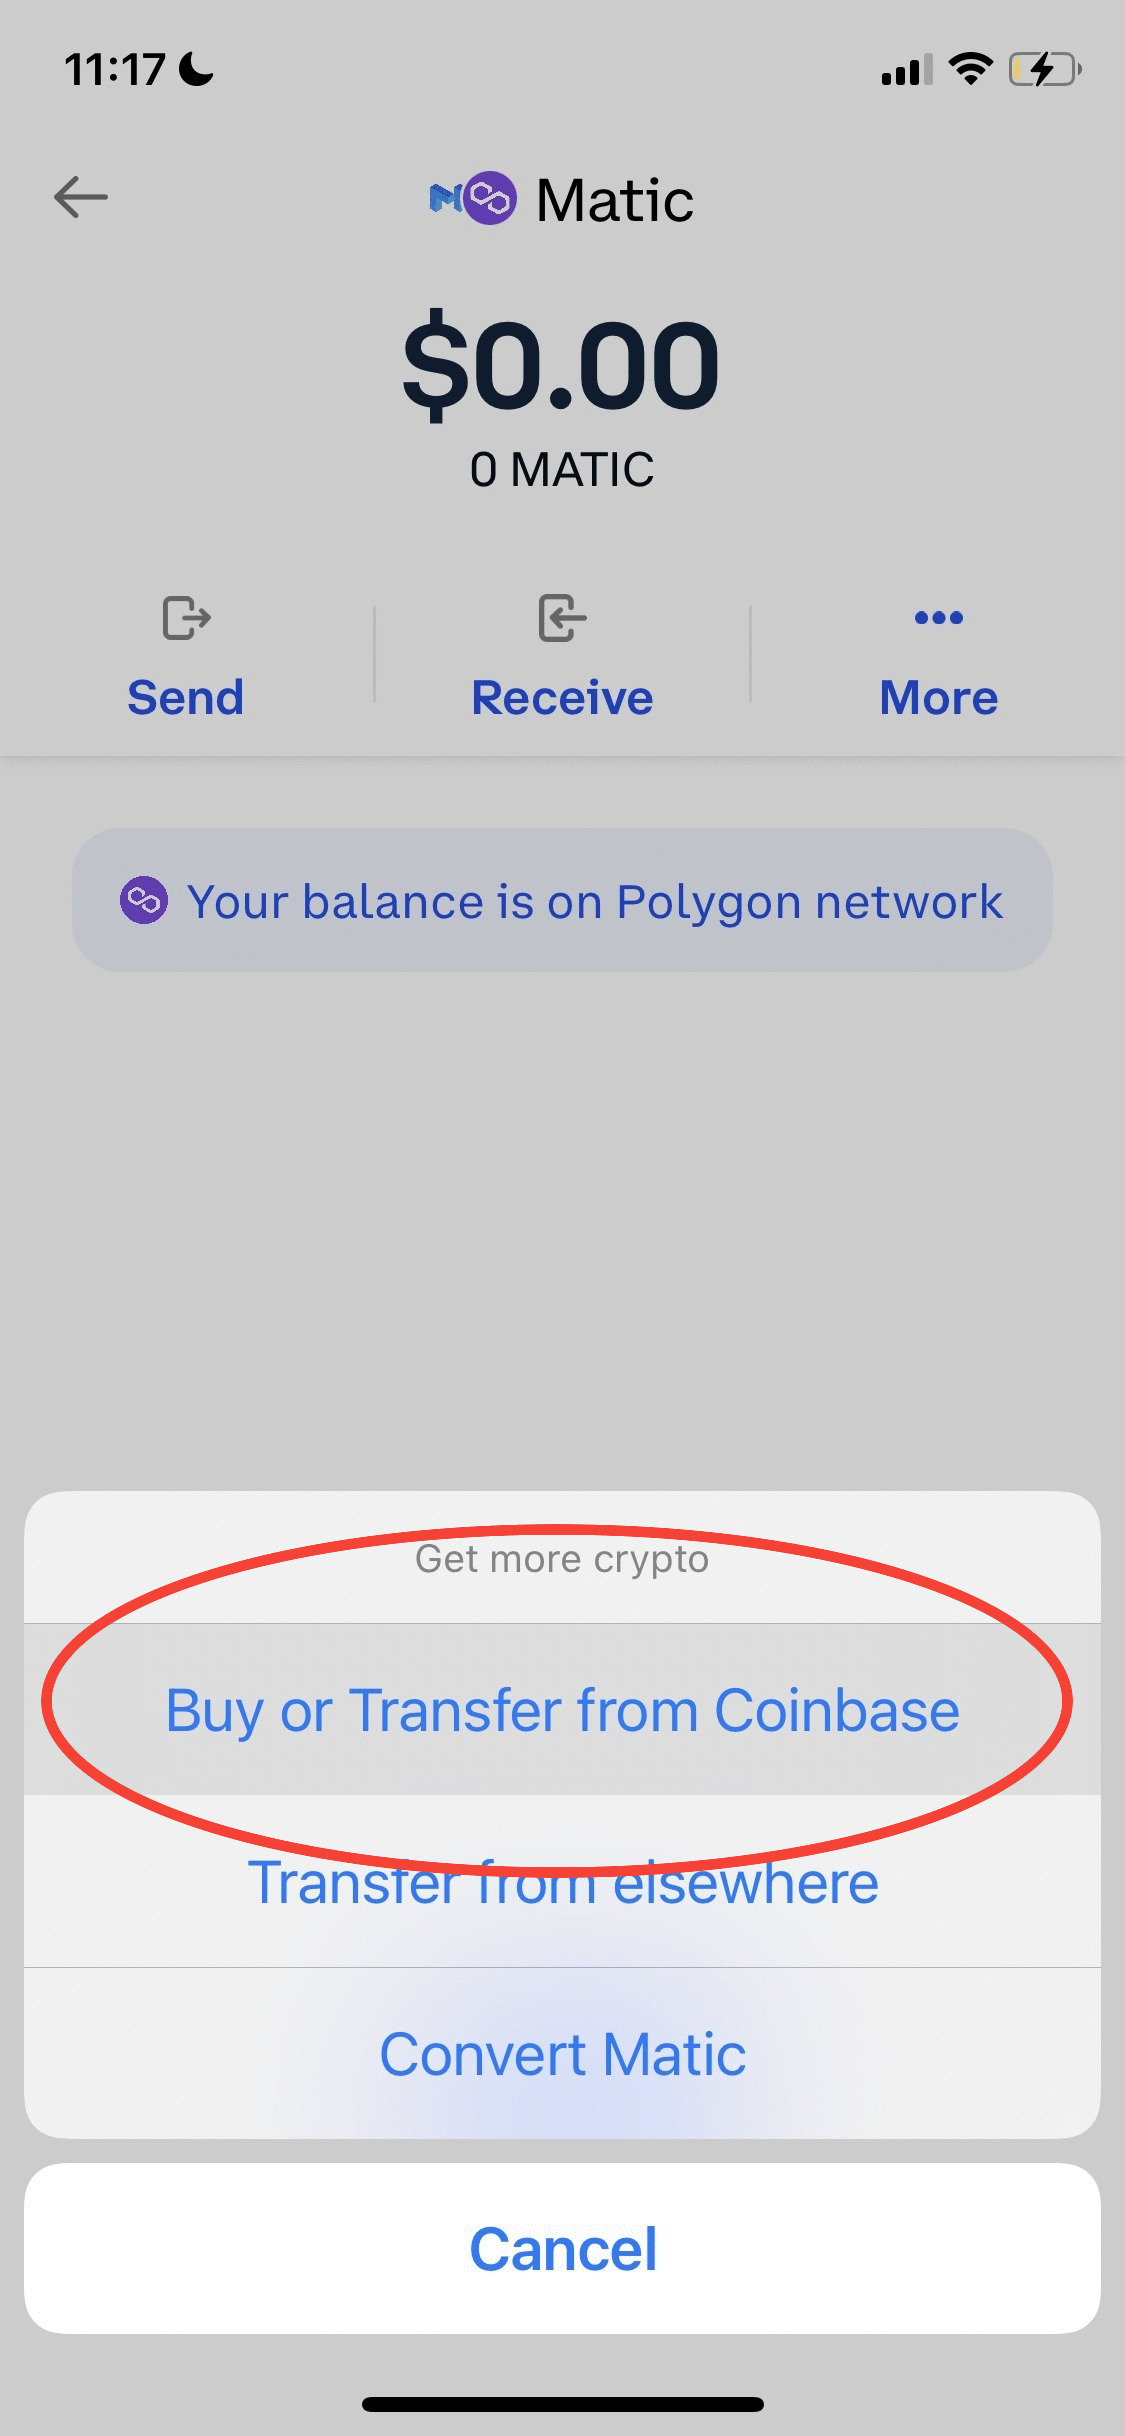
- Purchase MATIC from Coinbase app / Coinbase.com / or another CEX that’s ERC 20
- Send all MATIC to Coinbase wallet address (wallet address found in wallet tab, under balance, select receive, MATIC)
- Follow steps 1 to 4 bellow!
Option 3:
- Use moonpay.com/buy/matic
- Choose MATIC as currency
- Purchase in increments of NFT price to match amount of NFTs you’d like to purchase
- Receive MATIC via your Coinbase wallet address (wallet address found in wallet tab, under balance, select receive, MATIC)
- Follow steps 1 to 4 bellow!
*Don’t forget to purchase a little bit extra to cover transfer fees*
Option 1:
- Make sure your wallet is connected to the ETH main net for this step (This is the default when you make a new wallet)
- Purchase MATIC from Coinbase app / Coinbase.com / or another CEX that’s ERC 20
- Send all MATIC to Metamask wallet address (wallet address found in wallet, select receive to copy address)
- Follow steps 1 to 4 bellow!
Option 2:
- Use moonpay.com/buy/matic
- Choose MATIC as currency
- Purchase in increments of NFT price to match amount of NFTs you’d like to purchase
- Receive MATIC via your Metamask wallet address (wallet address found in wallet, select receive to copy address)
- Follow steps 1 to 4 bellow!
*Don’t forget to purchase a little bit extra to cover transfer fees*


Step 1: : Add ETH to wallet to cover gas fee (this is only to bridge your MATIC from ETH to Polygon)
- Purchase ≈$50-100 worth of ETH. Gastracker can help you with this
- You can do this via a CEX, or directly on your wallet
- Send ETH to your wallet address if purchased via CEX
Step 2: Add Matic Mainnet to wallet
IMPORTANT: Only add the mainnet. After adding, please switch back to the Etherium mainnet for step 3.
Option 1: For Coinbase Wallet users only
- Go to your Coinbase Wallet Settings
- Go to "Default Network"
- Click on "Polygon"
Option 2: Automatic
- In your wallet app’s browser, or in a browser with a wallet extension
- Go to Polygonscan.com
- Scroll to the bottom of the page. On the bottom right select “Add Polygon Network”
- Sign transaction to approve
Option 3: Manually
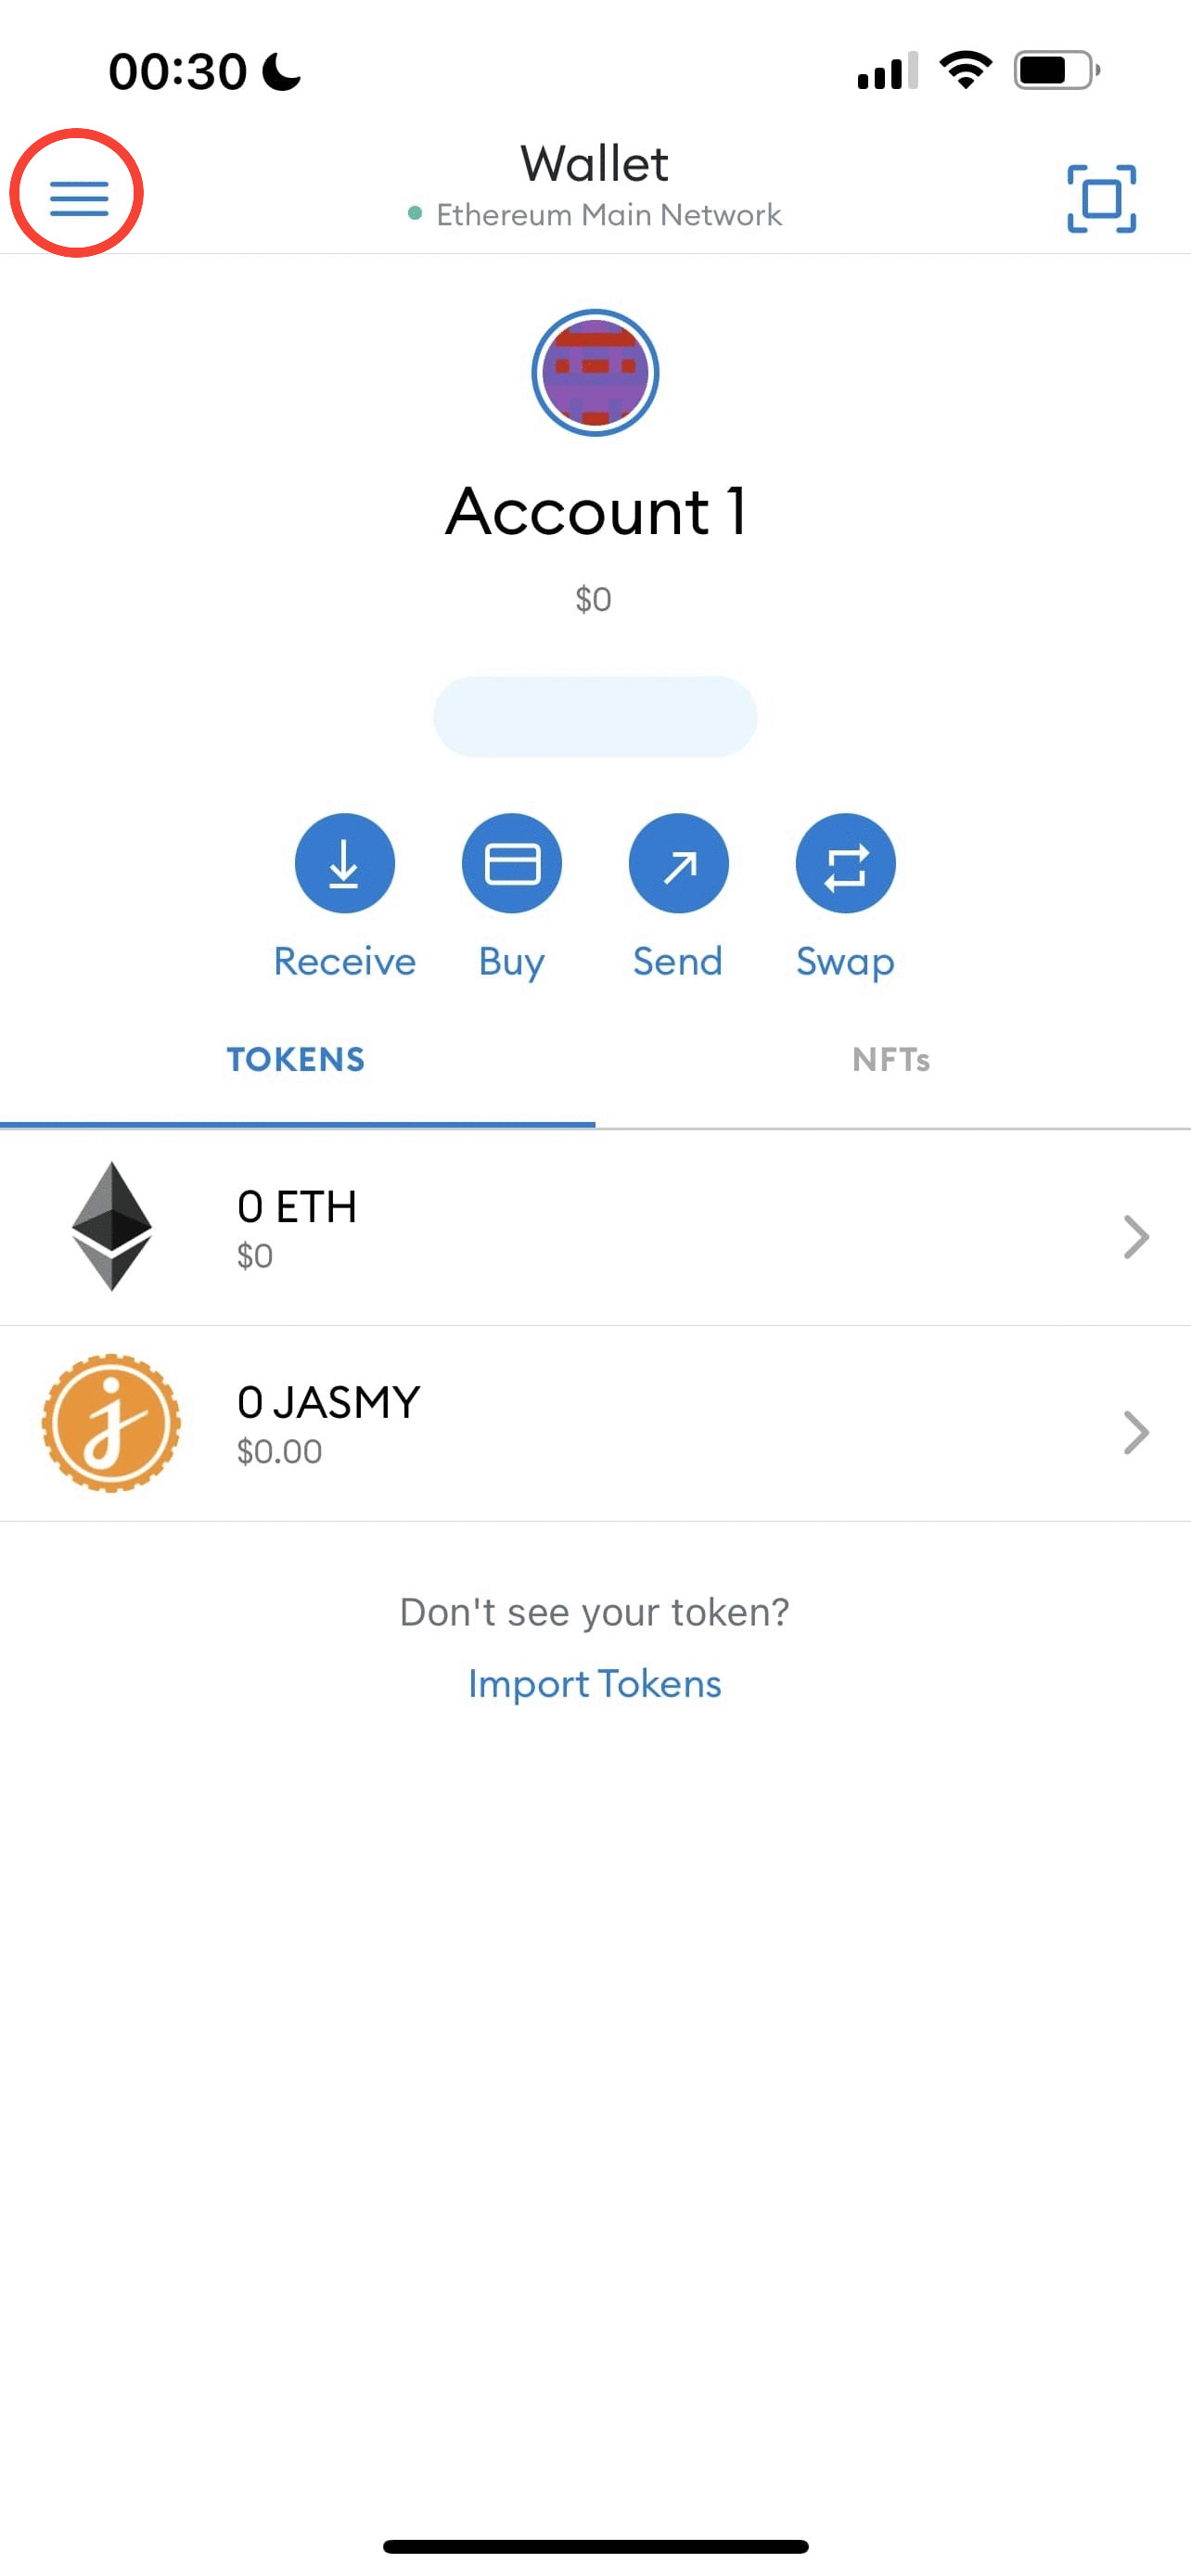
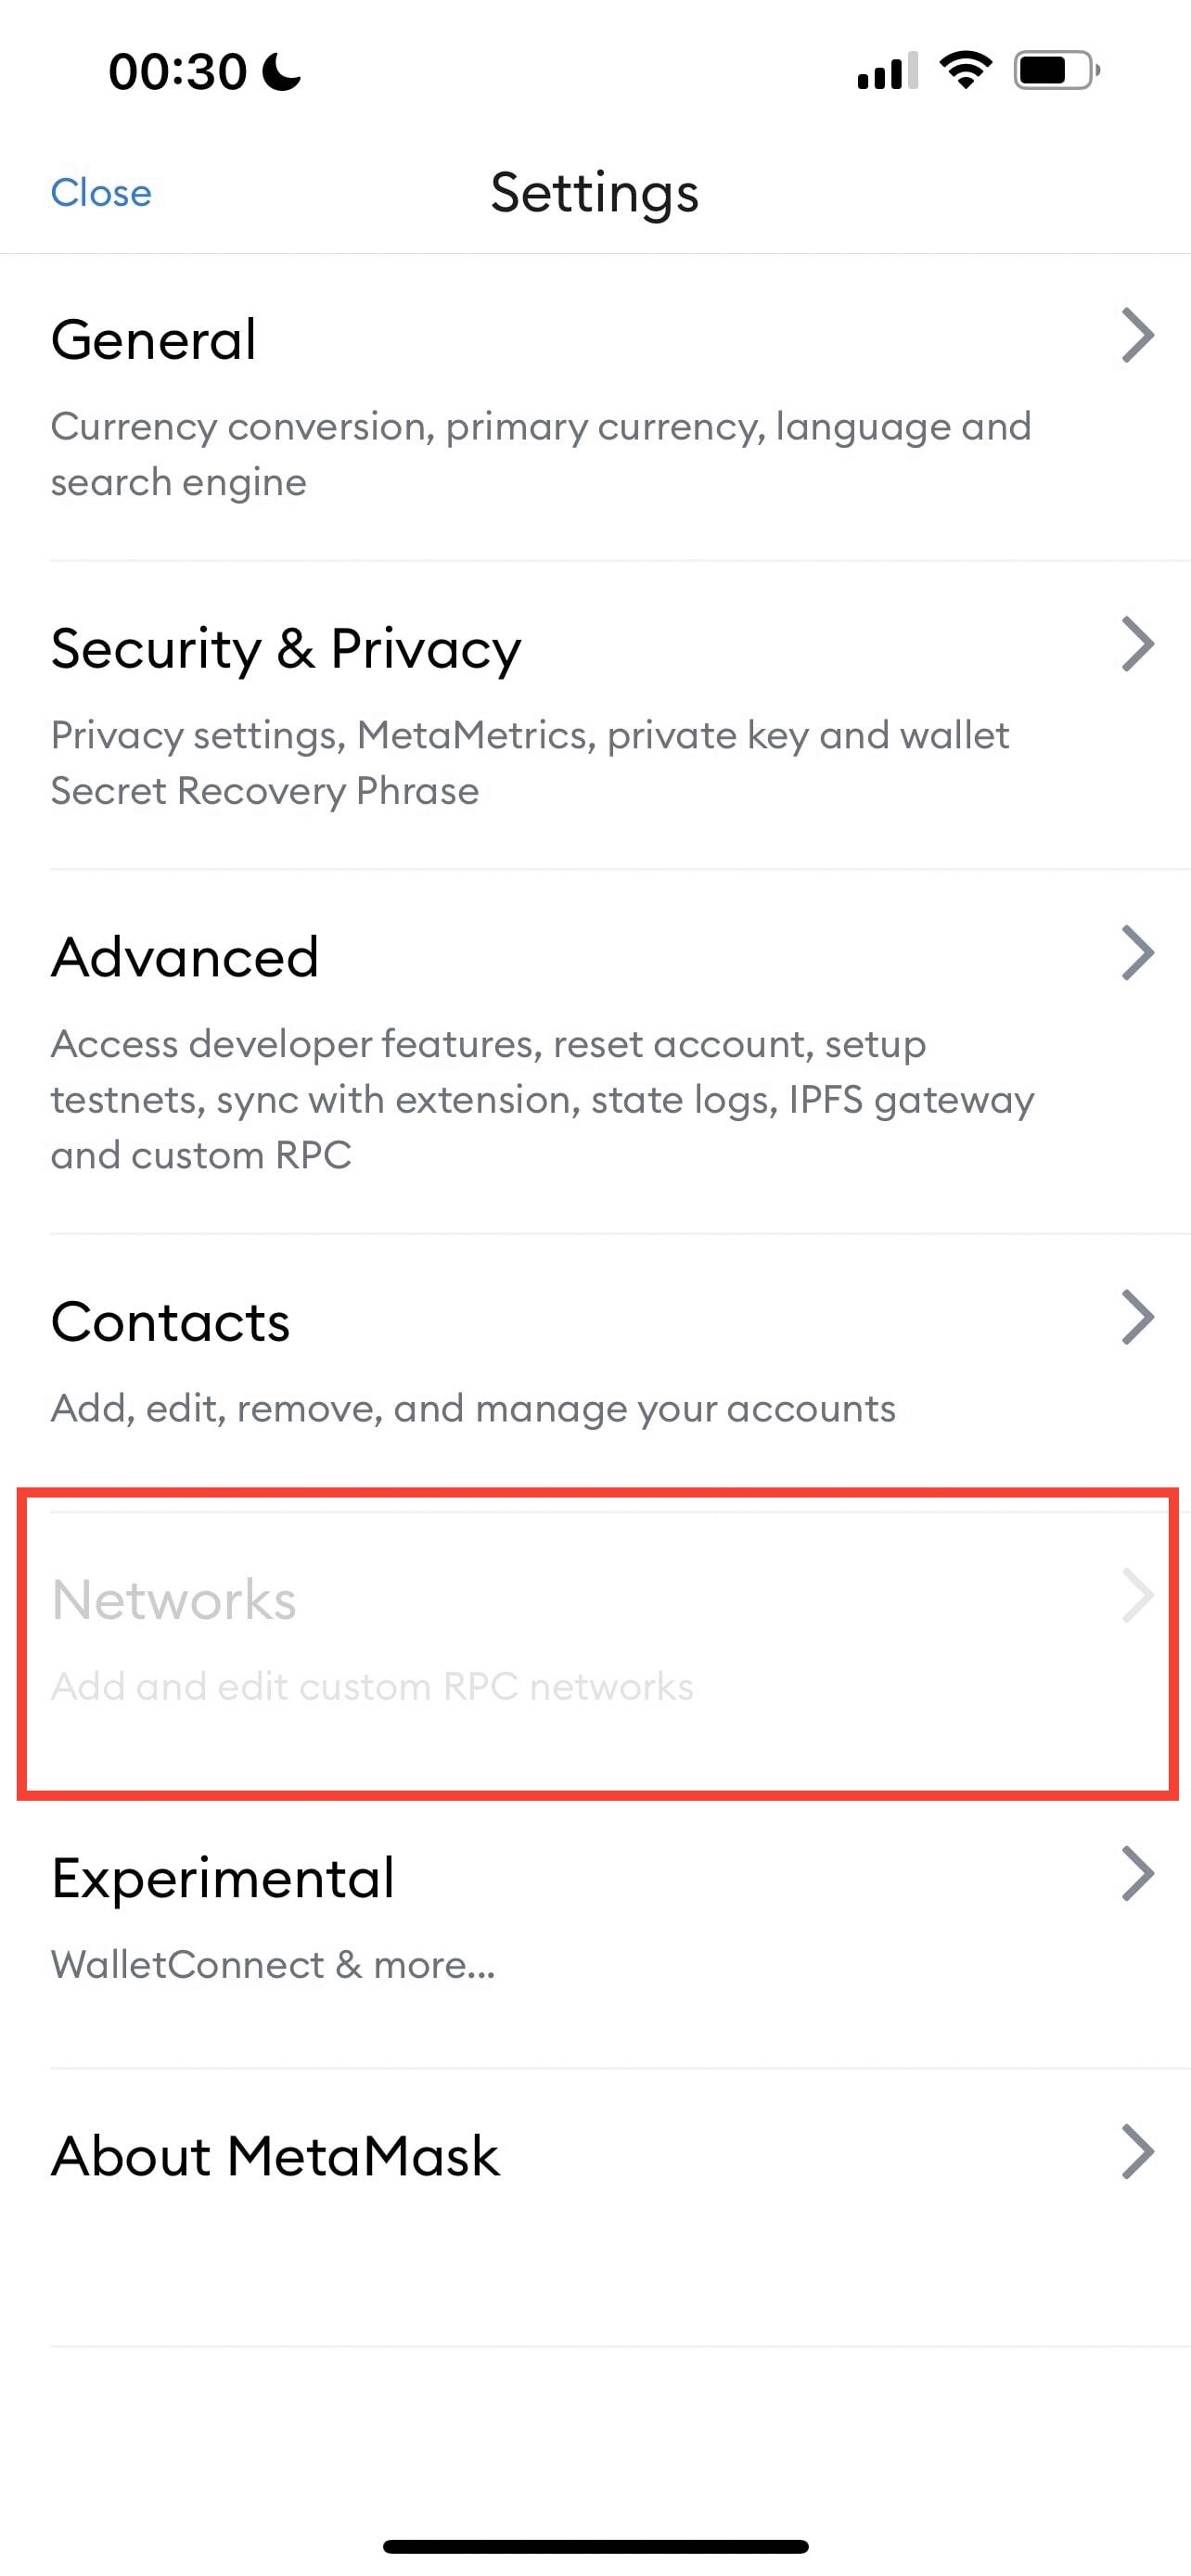
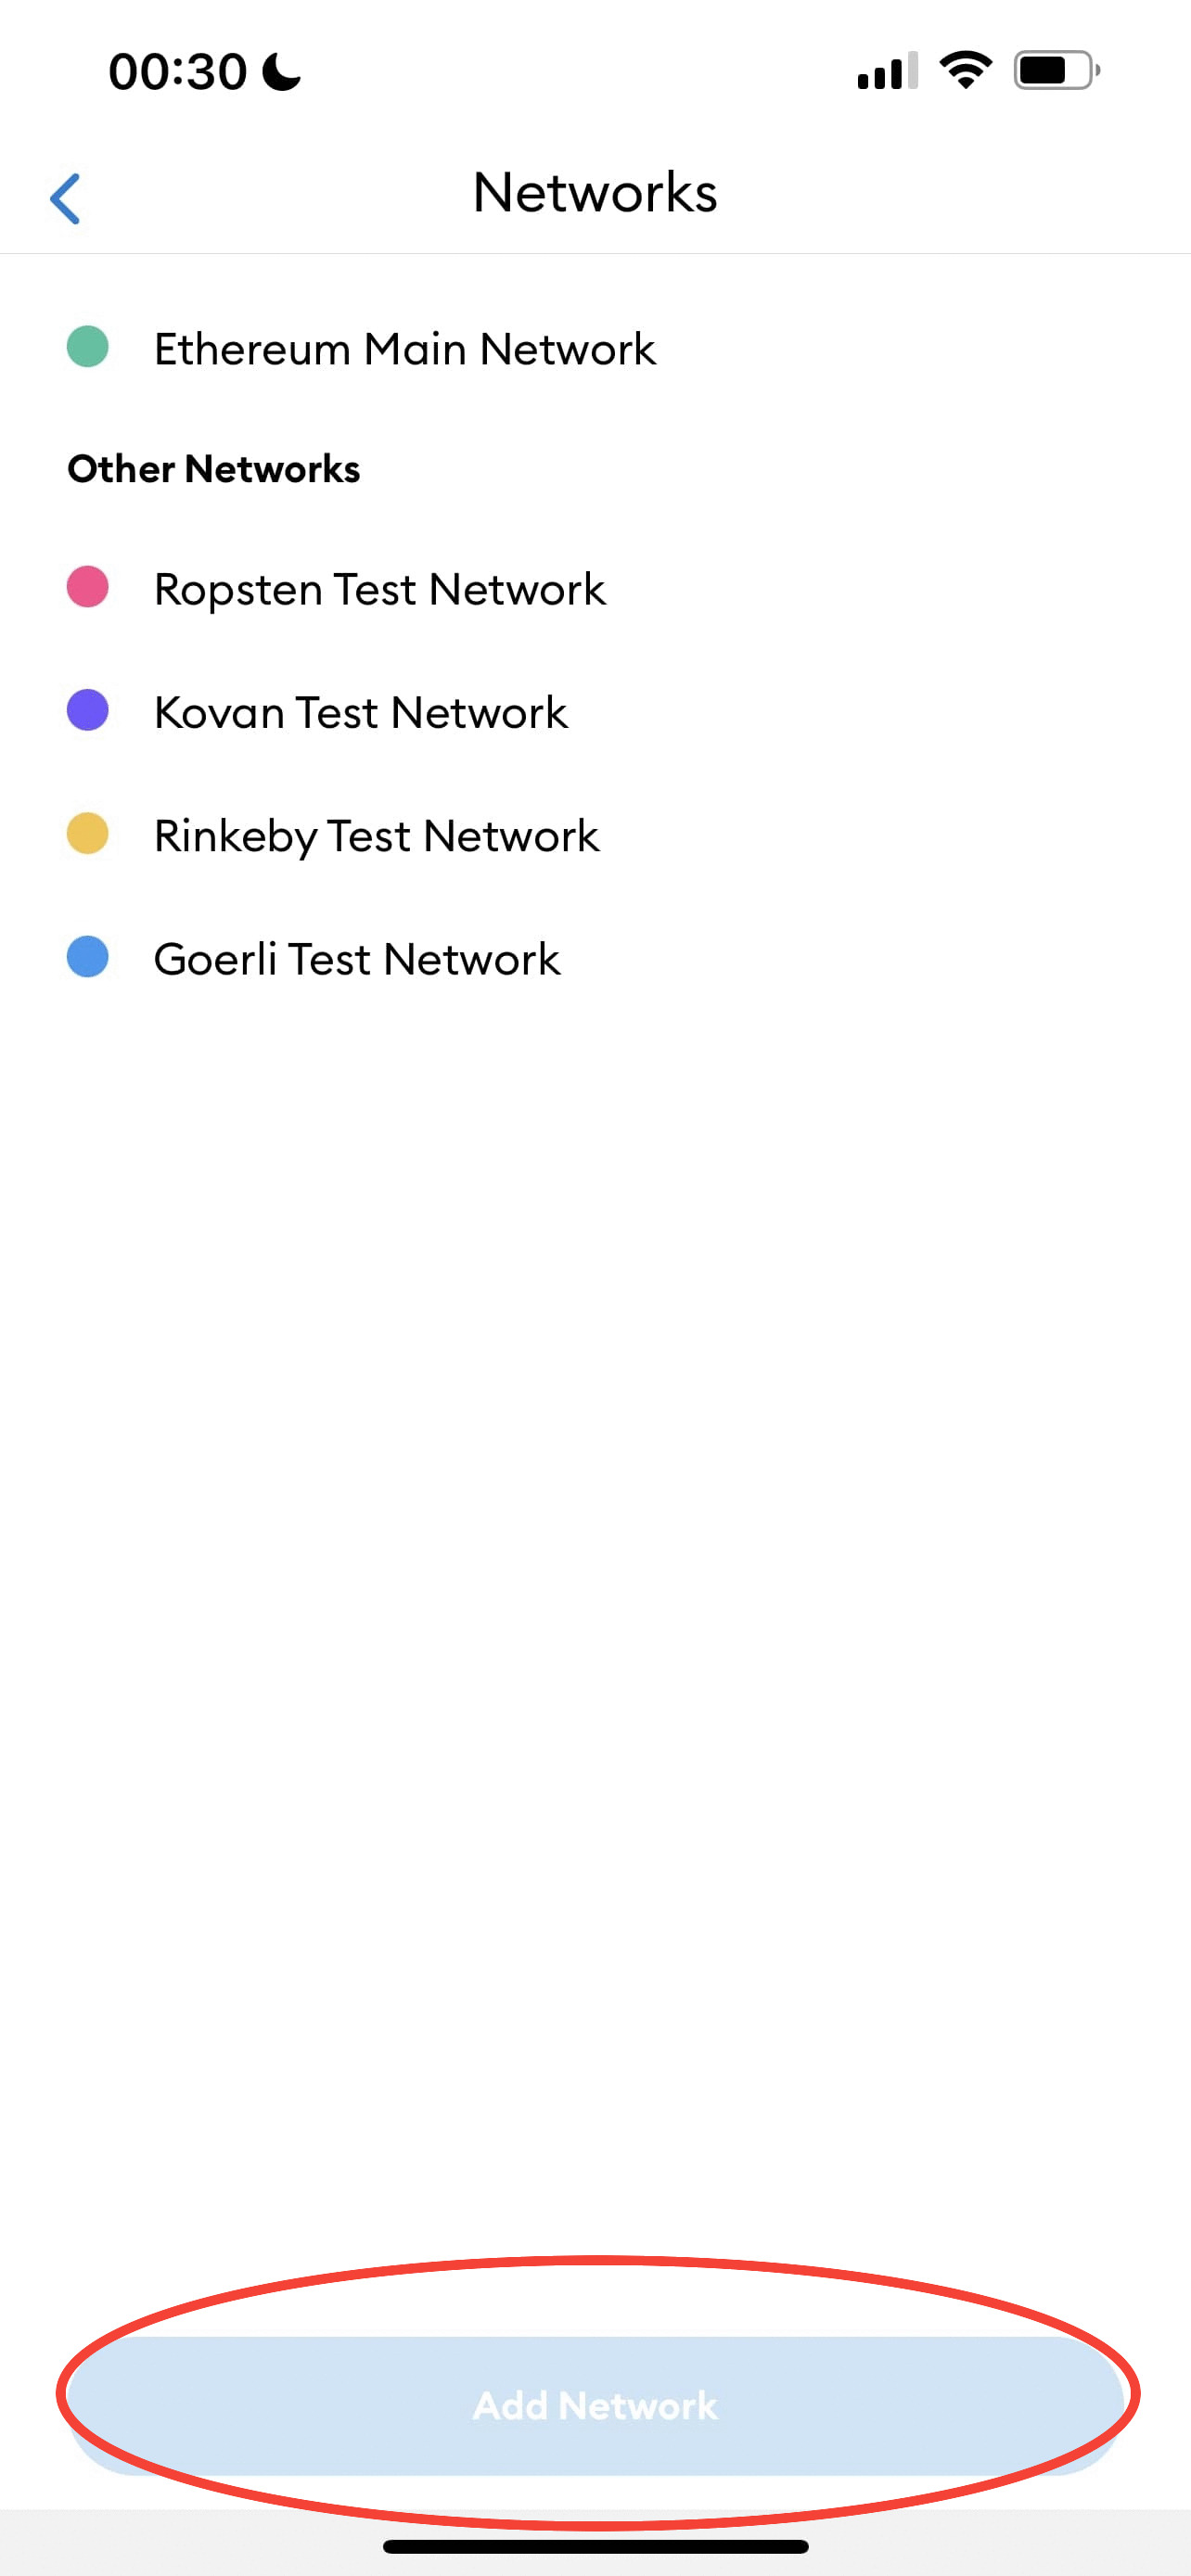
- Go to your wallet and add a new Network.
- On metamask this will be under: Menu-> Settings -> Networks -> Add network
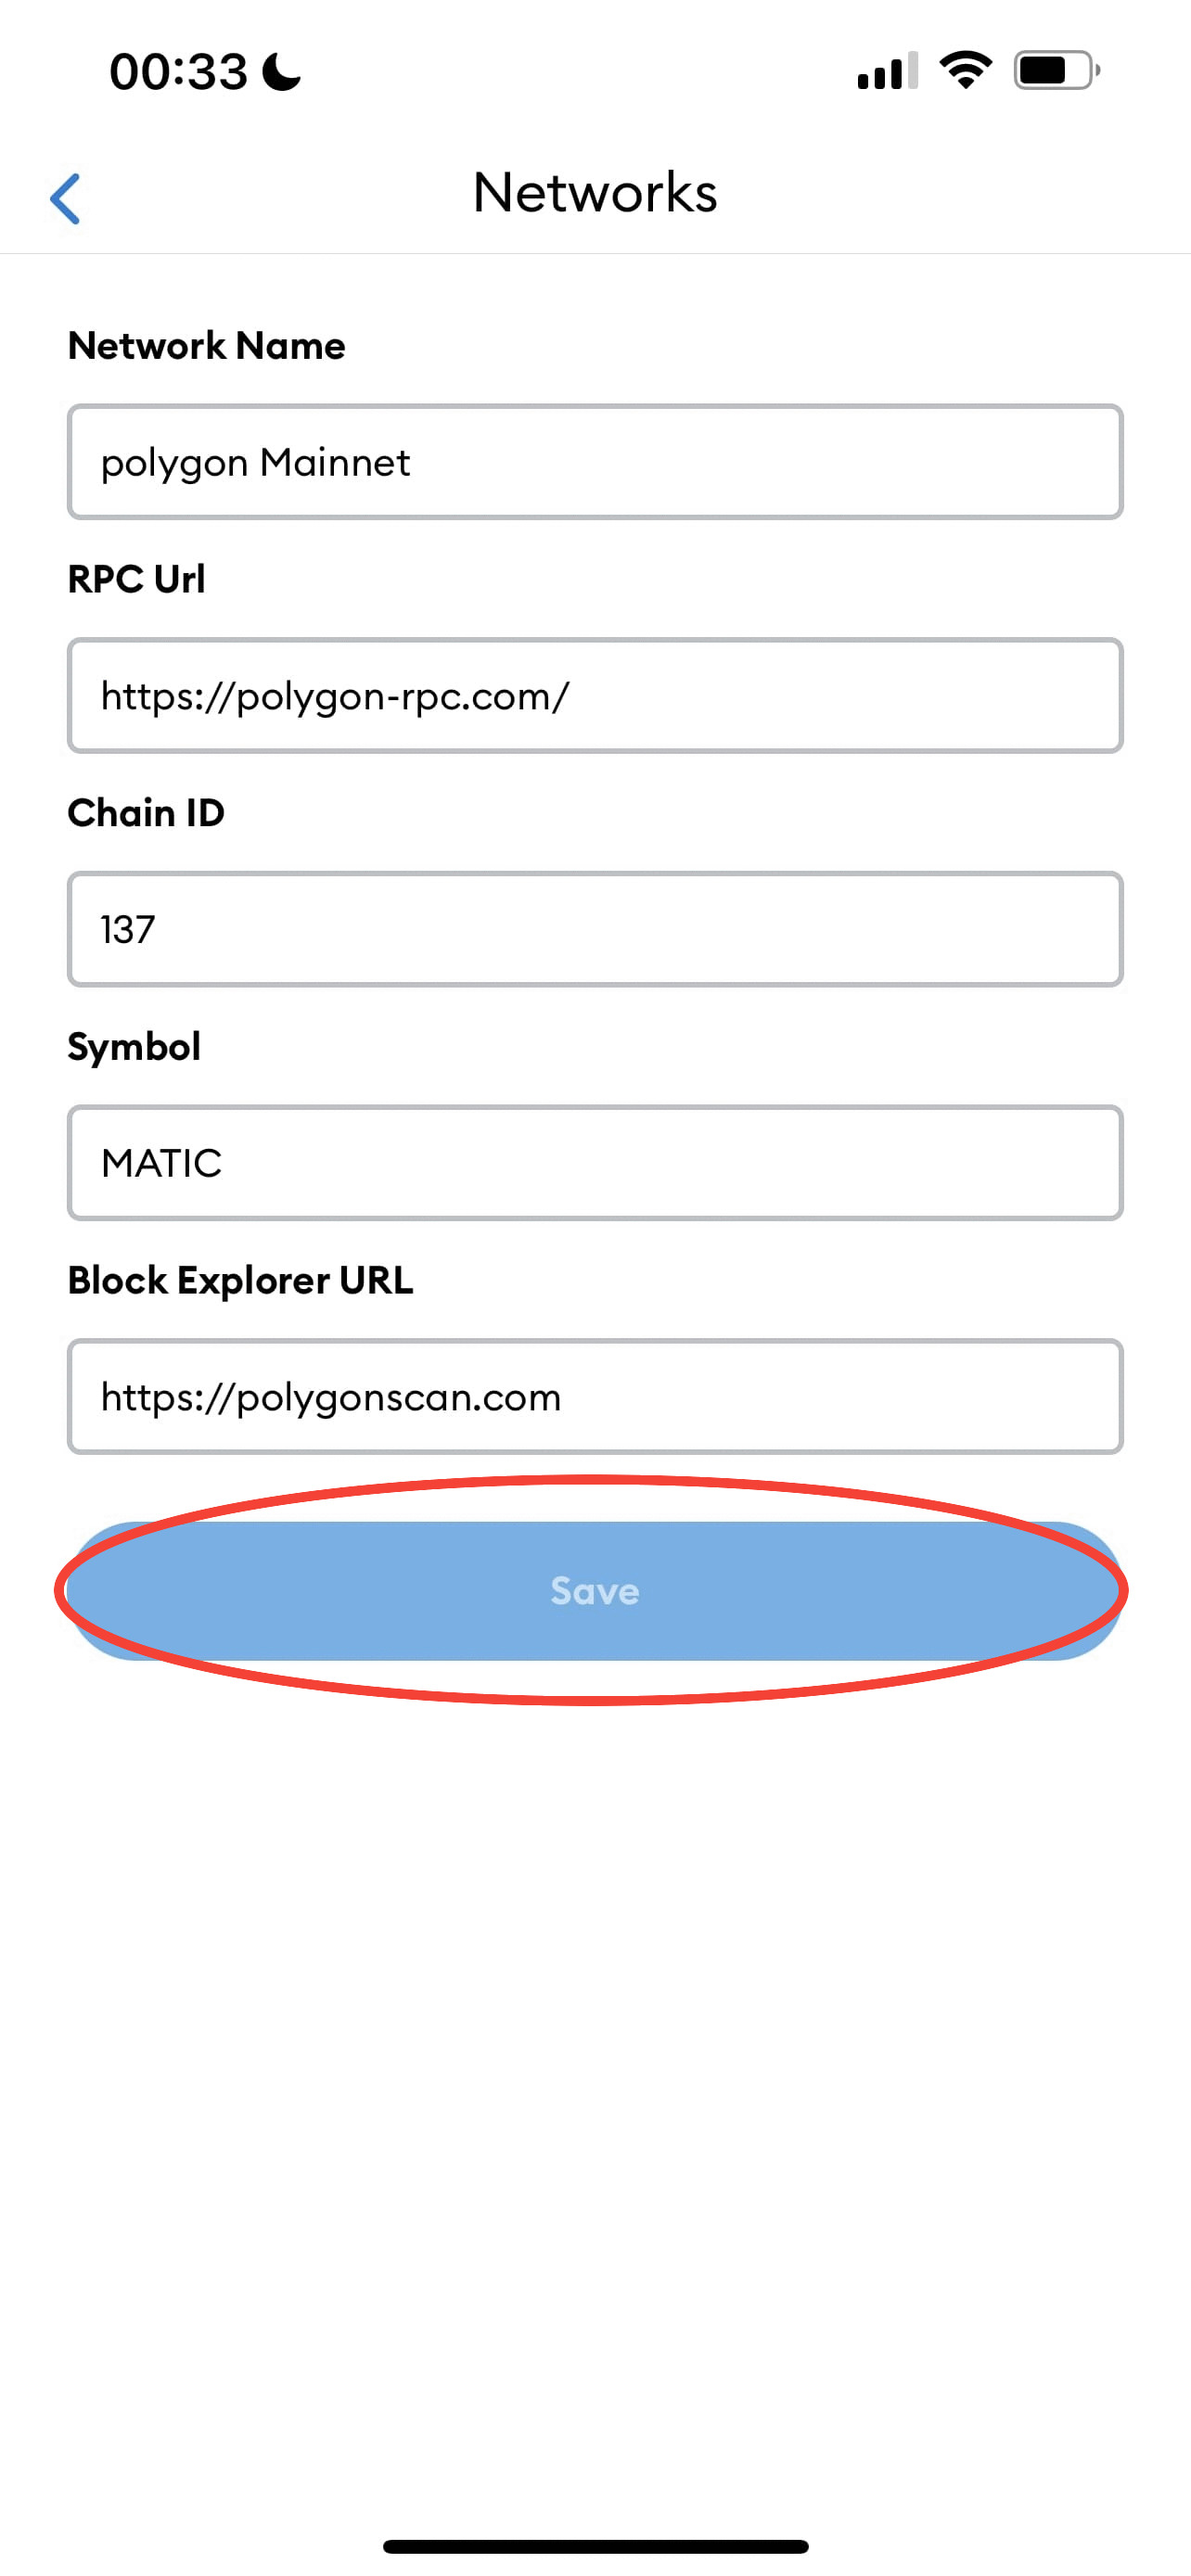
- Fill in following information:
Polygon Mainnetin the Network Name fieldhttps://polygon-rpc.com/in the New RPC URL field137in Chain ID fieldMATICin Block Explorer URL field.https://polygonscan.com/in Block Explorer URL field.- Press "Add" or "Save" to add the network to your wallet

Step 3: Bridge your ETH MATIC to Polygon MATIC
NOTICE: do not convert all your METIC to polygon, leave some for gas fees
Option 1: Umbria Network
- In your wallet app’s browser, or in a browser with a wallet extension, visit bridge.umbria.network
- Select “Bridge Assets”
- Send from ETH Mainnet
- Receive on Polygon Mainnet
- Change ETH to Polygon(MATIC)
- Input the amount of MATIC you’d like to convert
- Select “Send (metamask)” (this will send your ETH Matic out and return you with Polygon Matic)
- Sign transaction (this is where our ETH purchased for gas/miner fee is used)
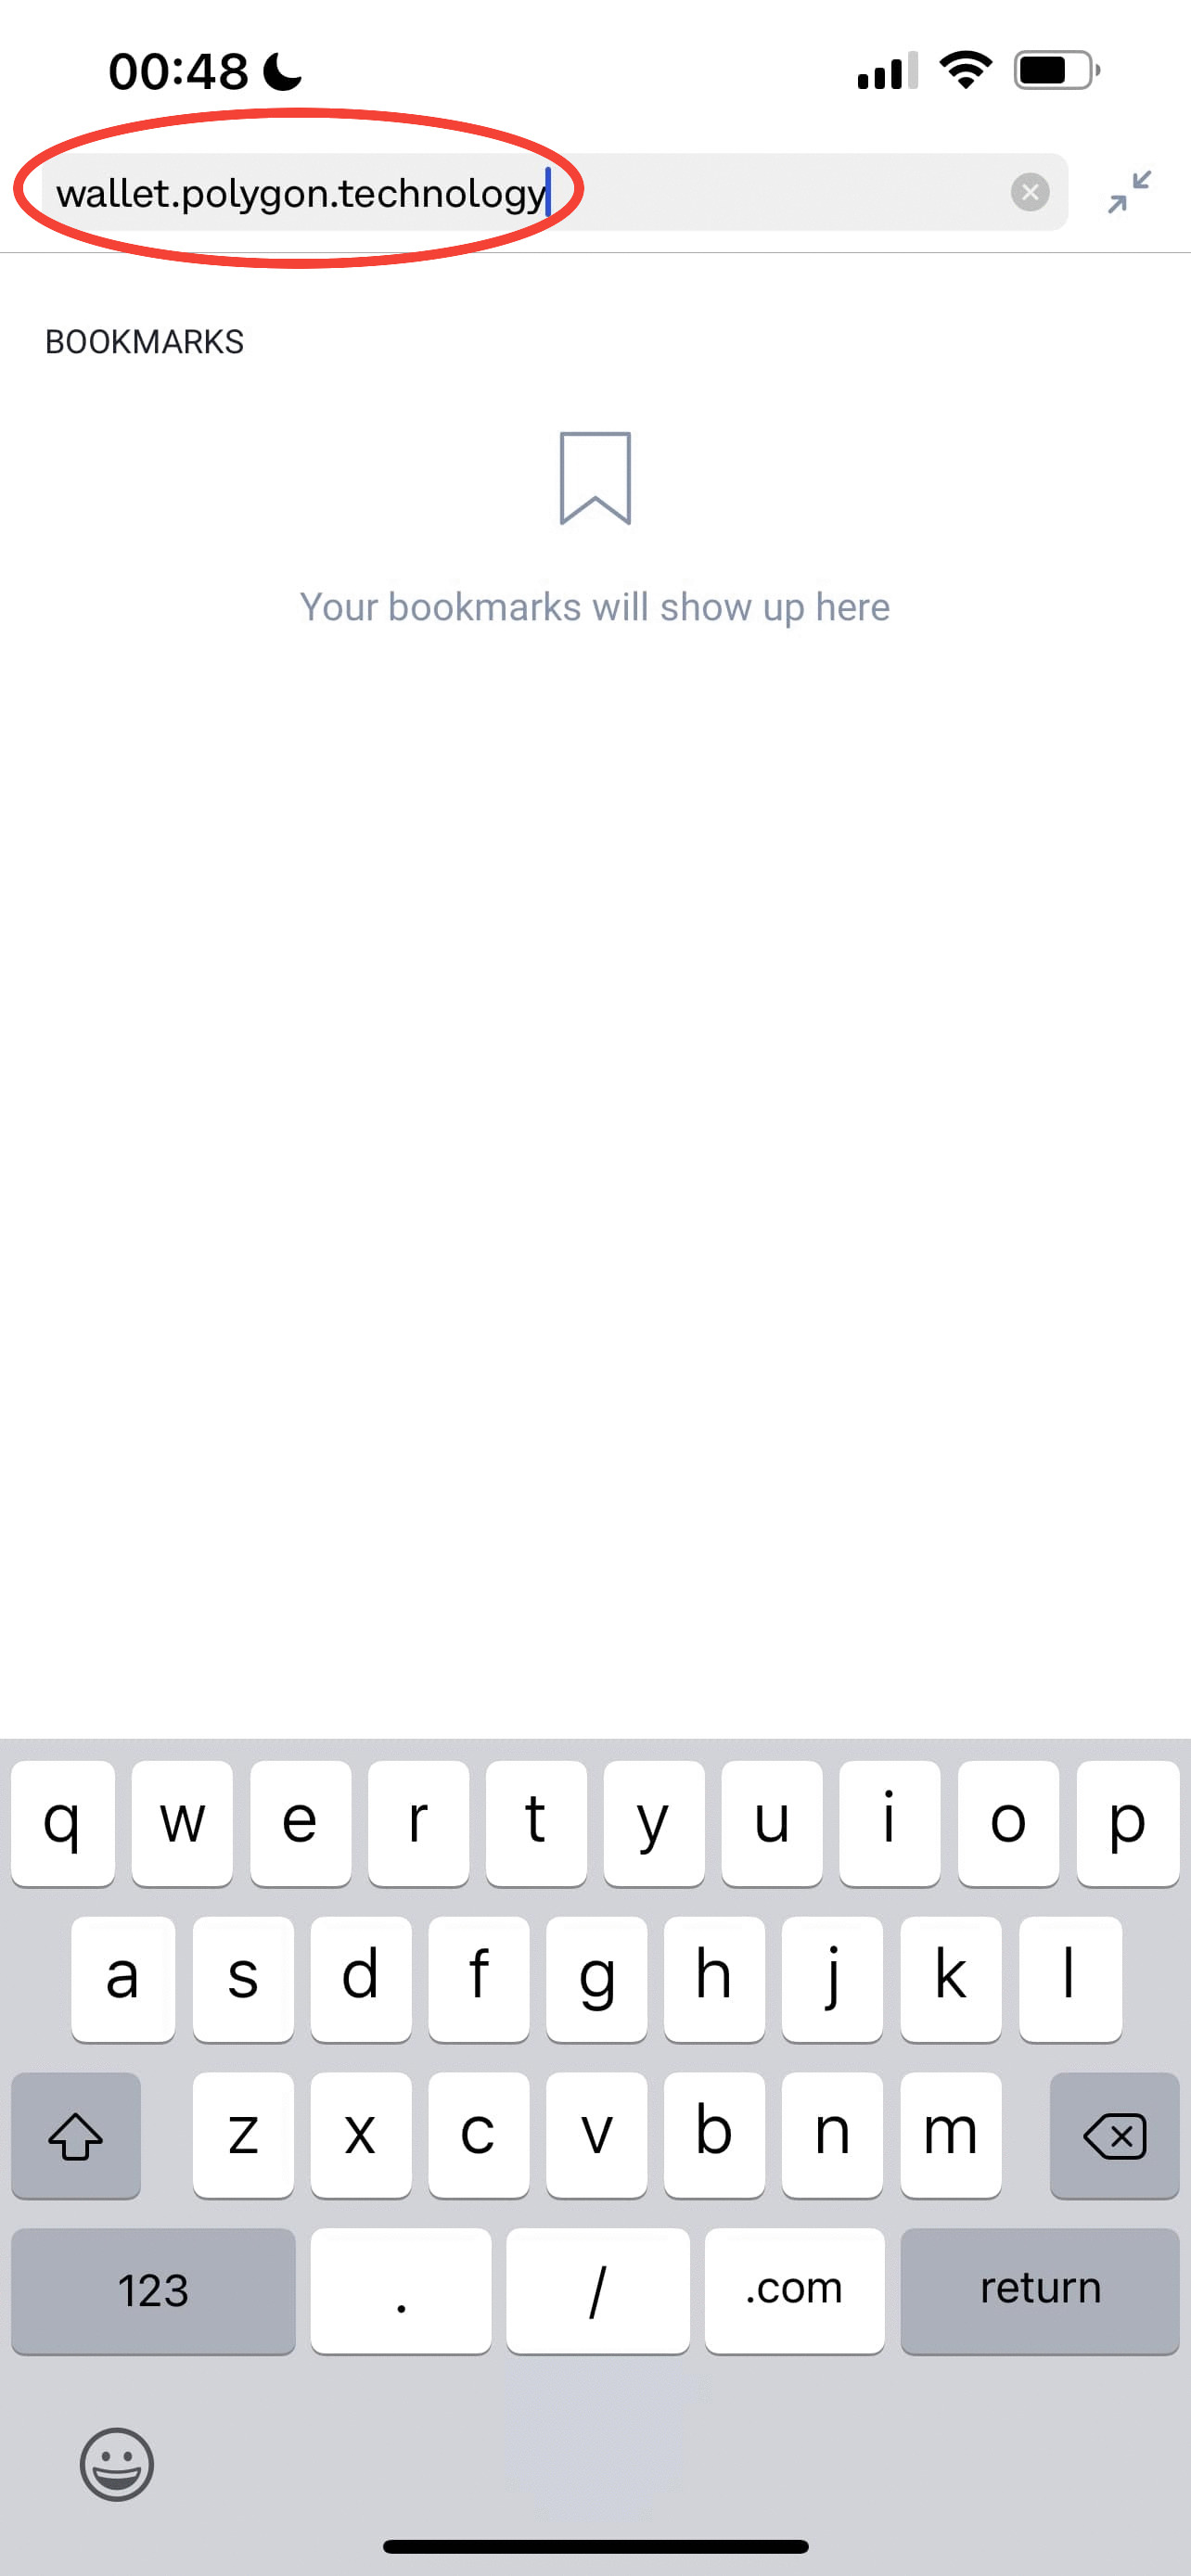
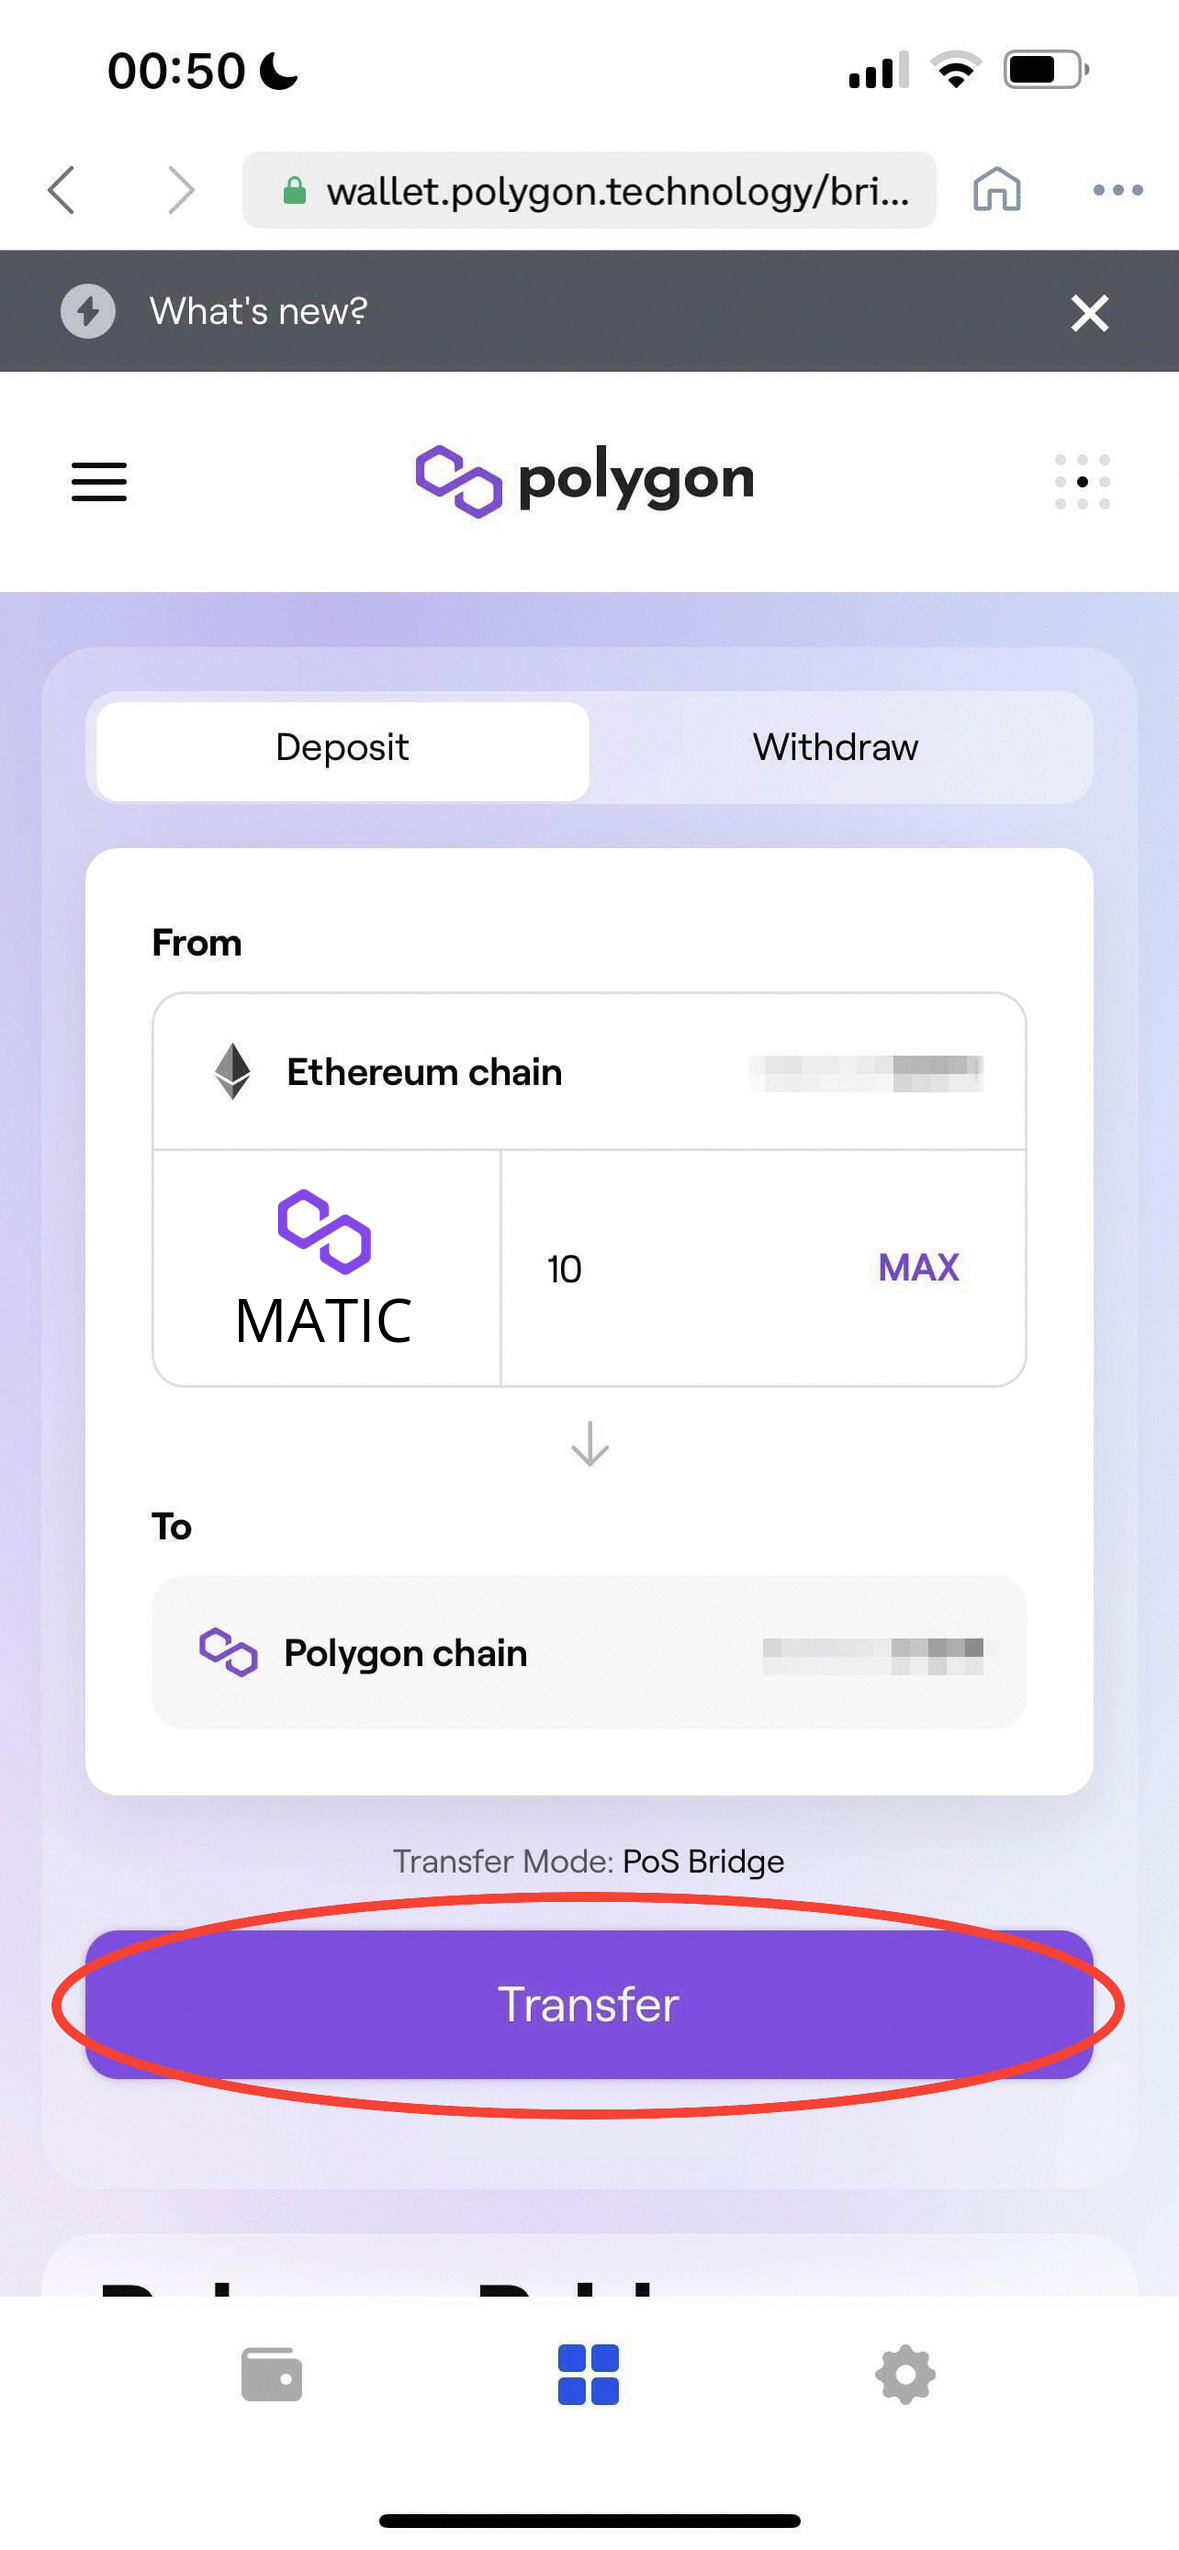
Option 2: Polygon Technology
- In your wallet app’s browser, or in a browser with a wallet extension, visit wallet.polygon.technology
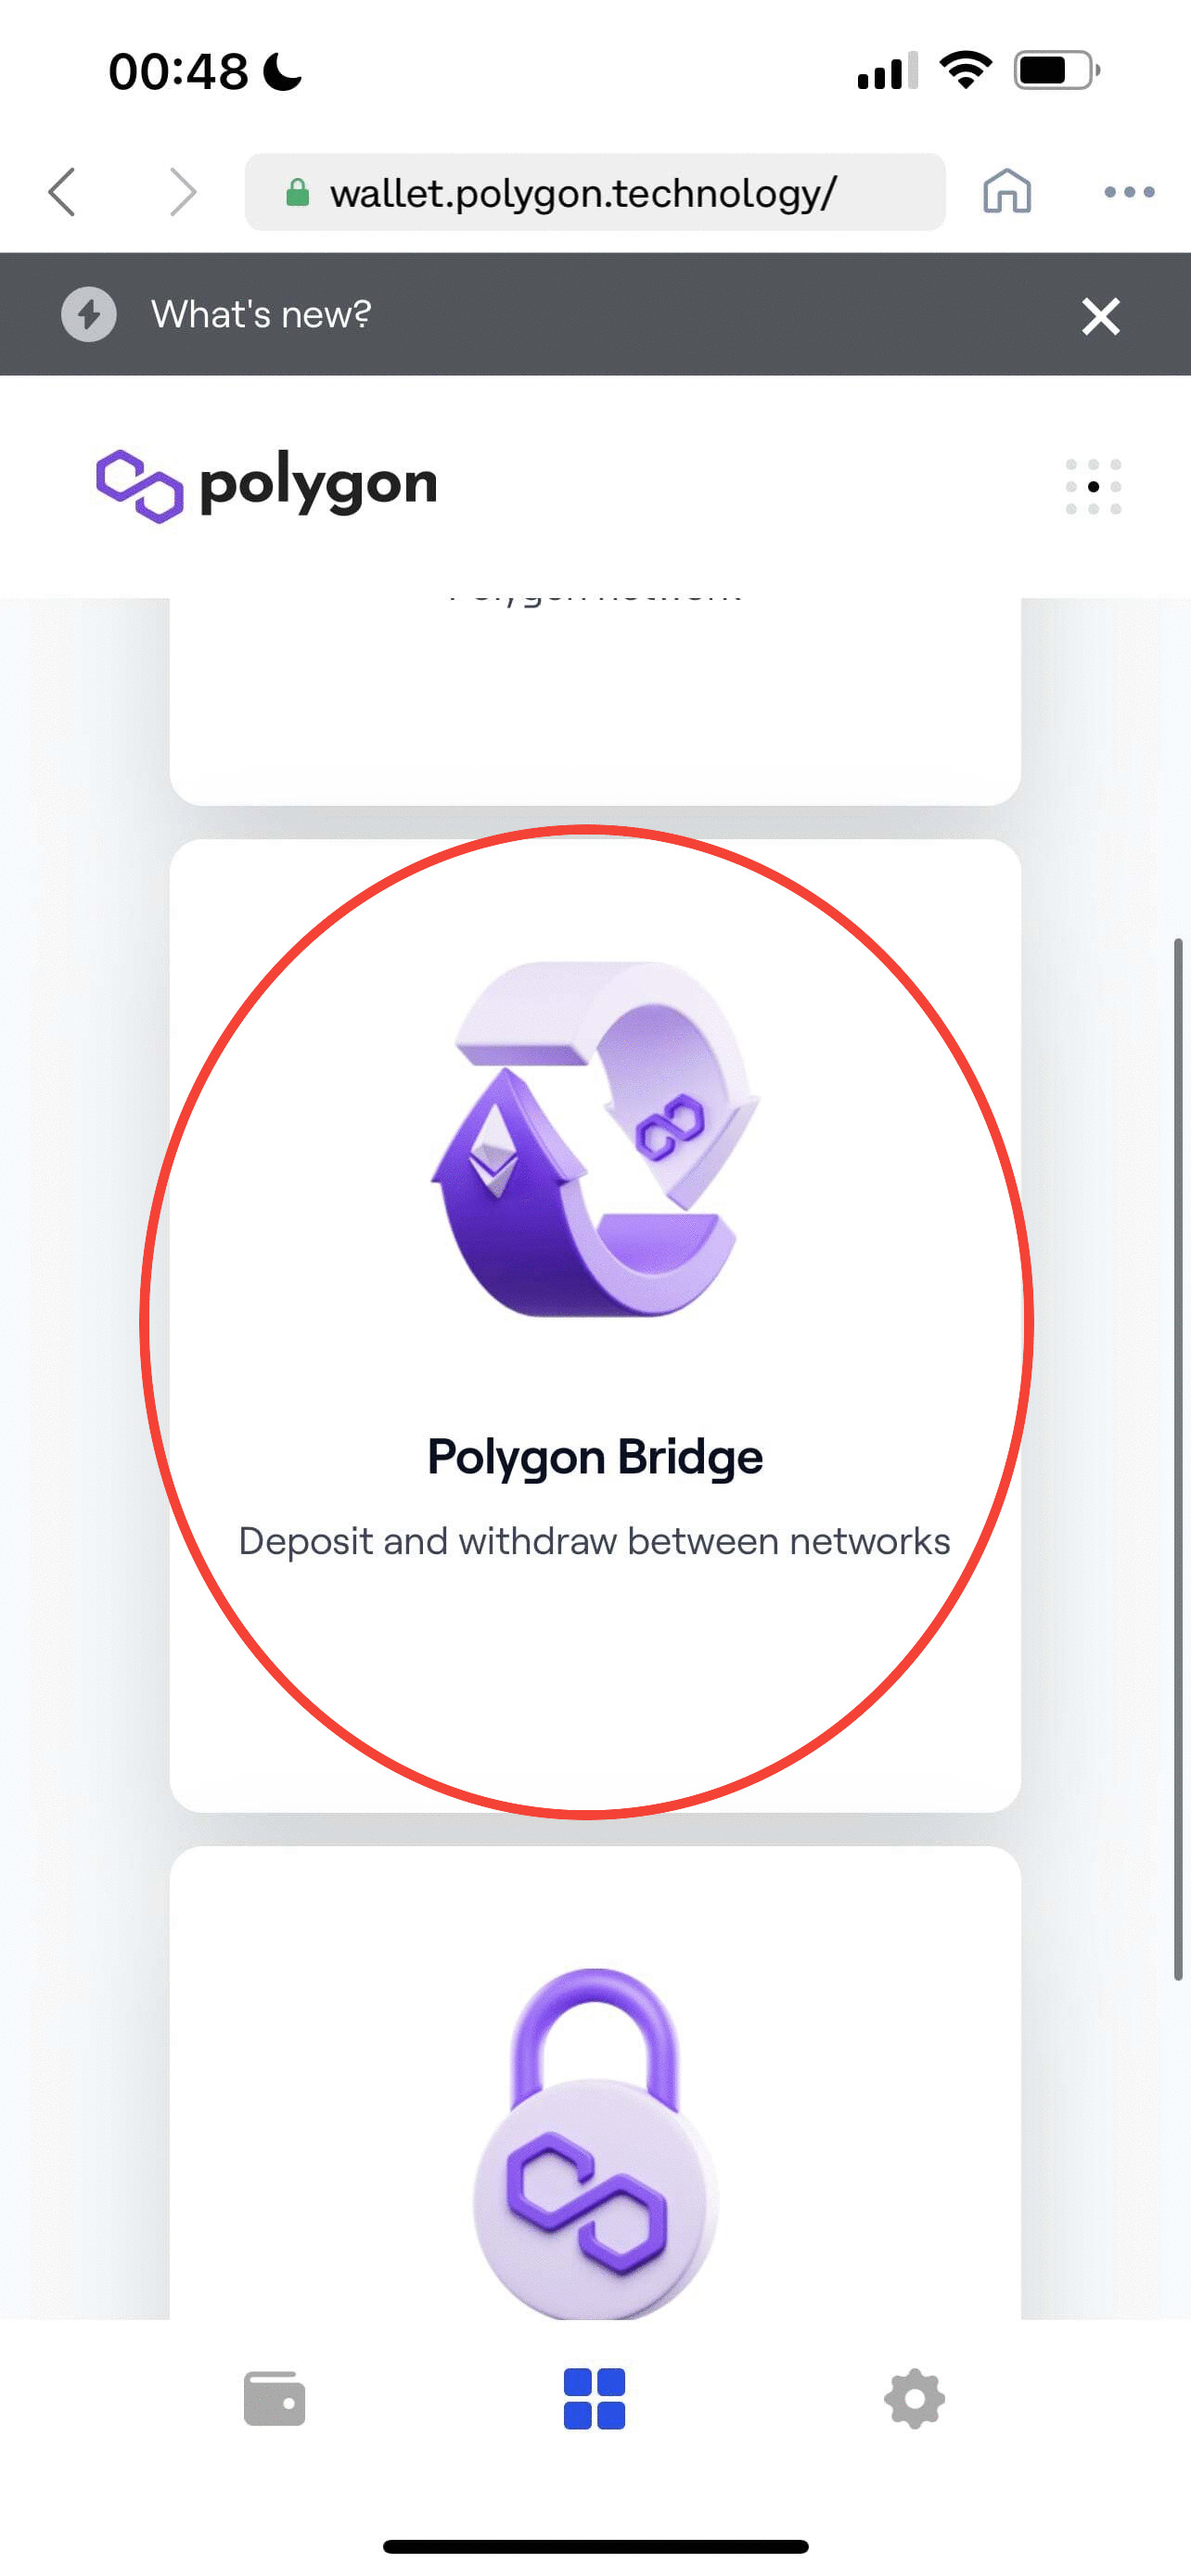
- Select “Polygon Bridge”
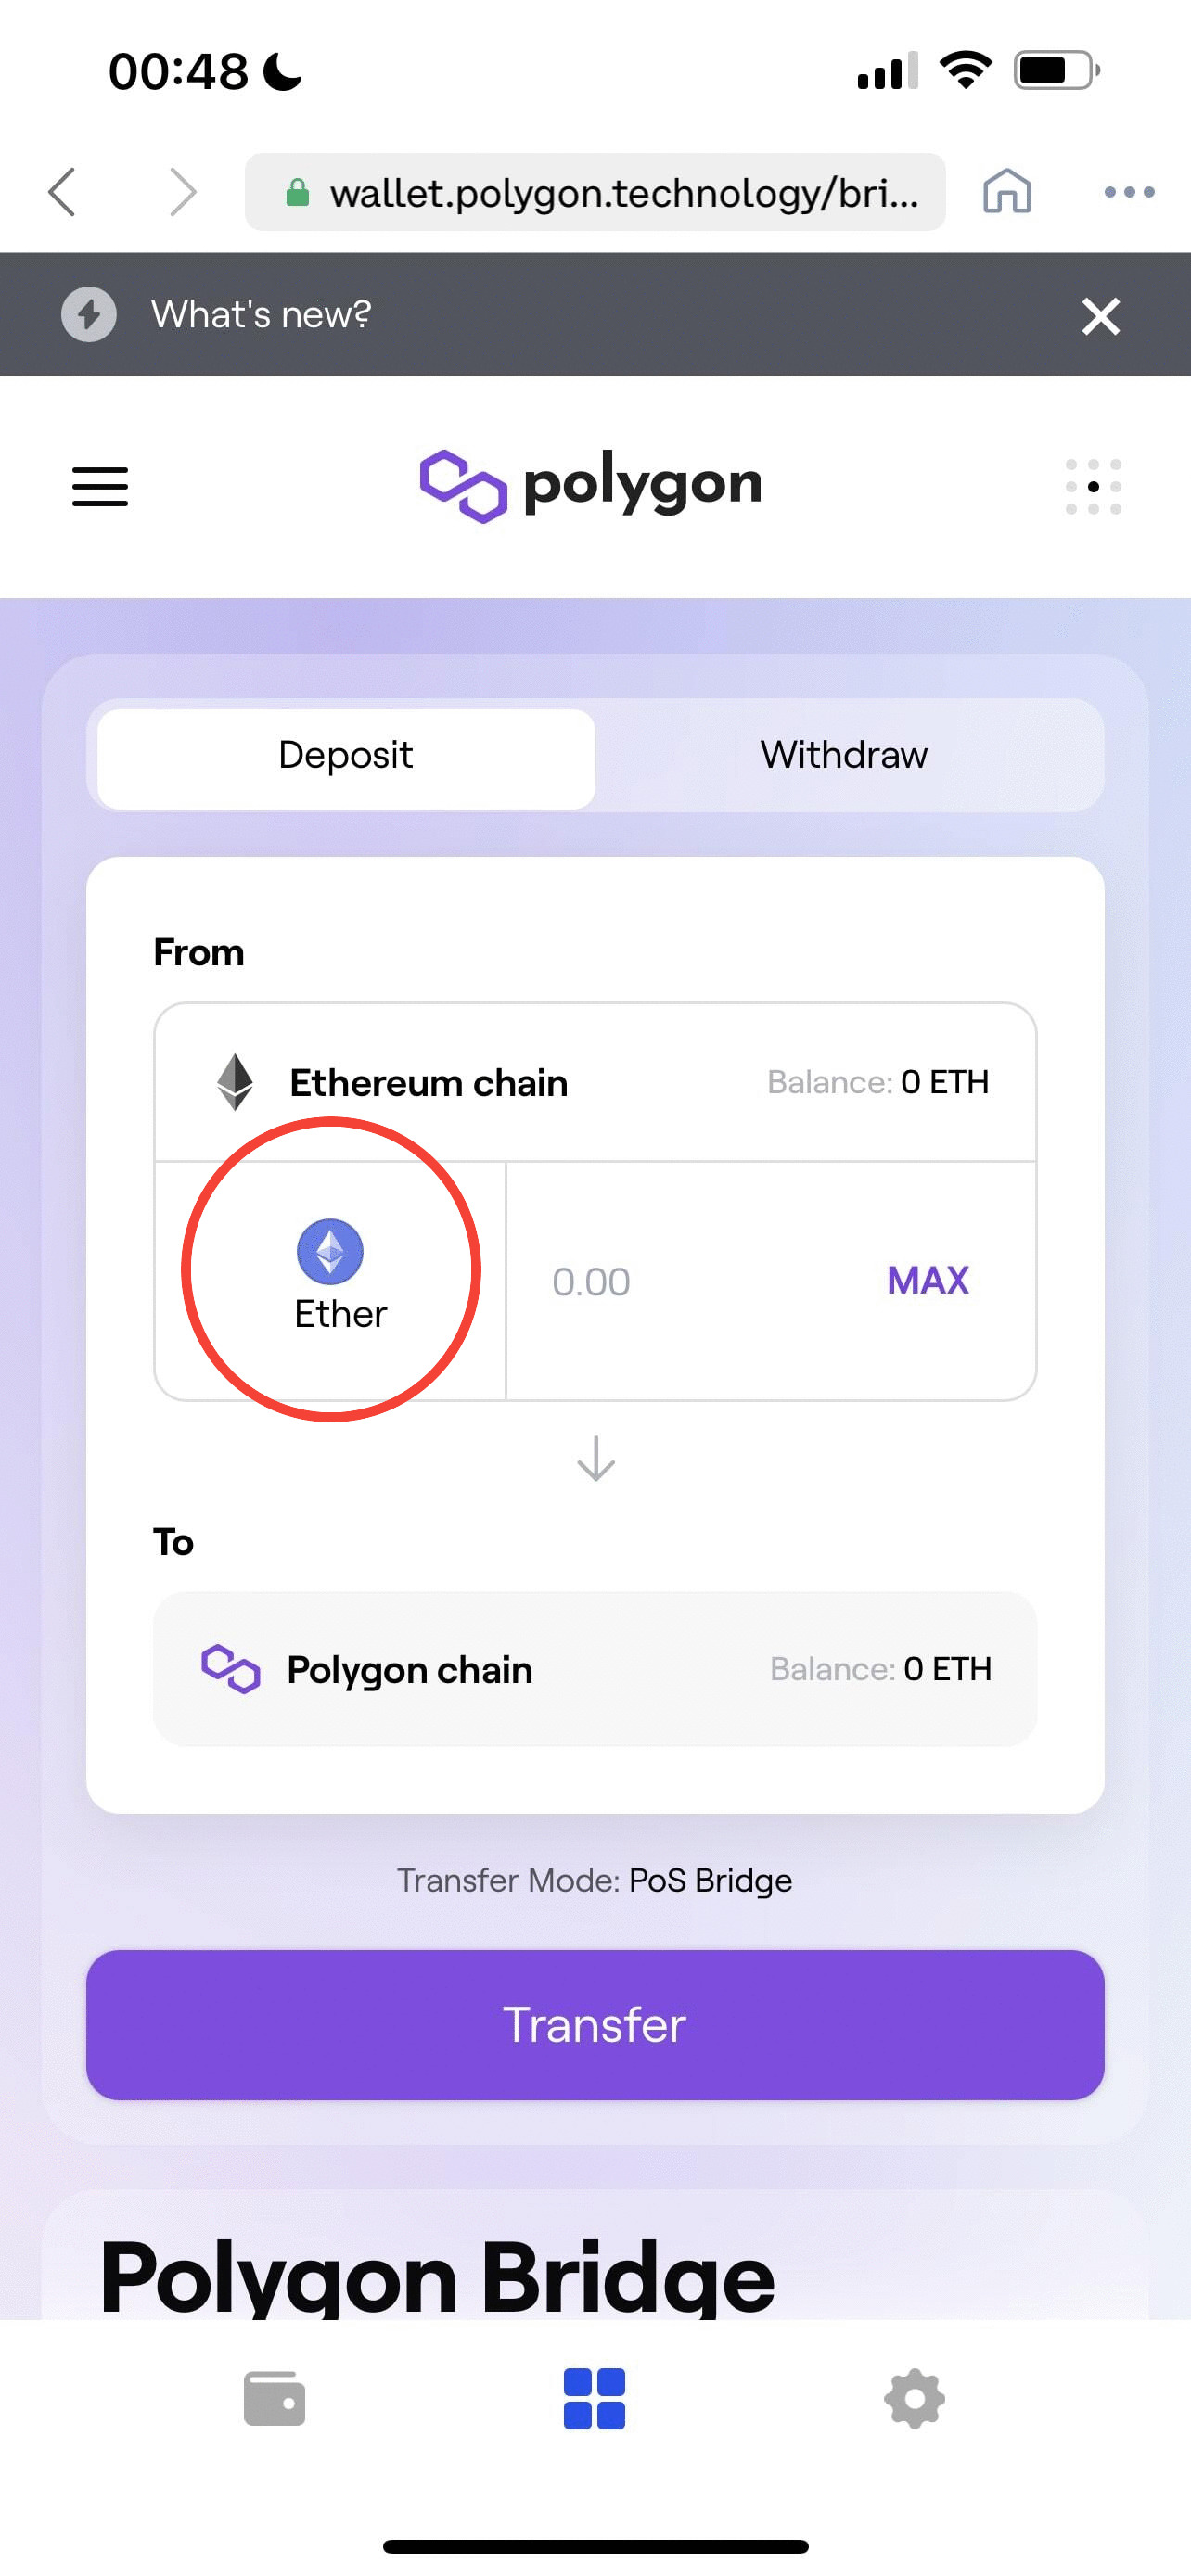
- Login and sign with your wallet
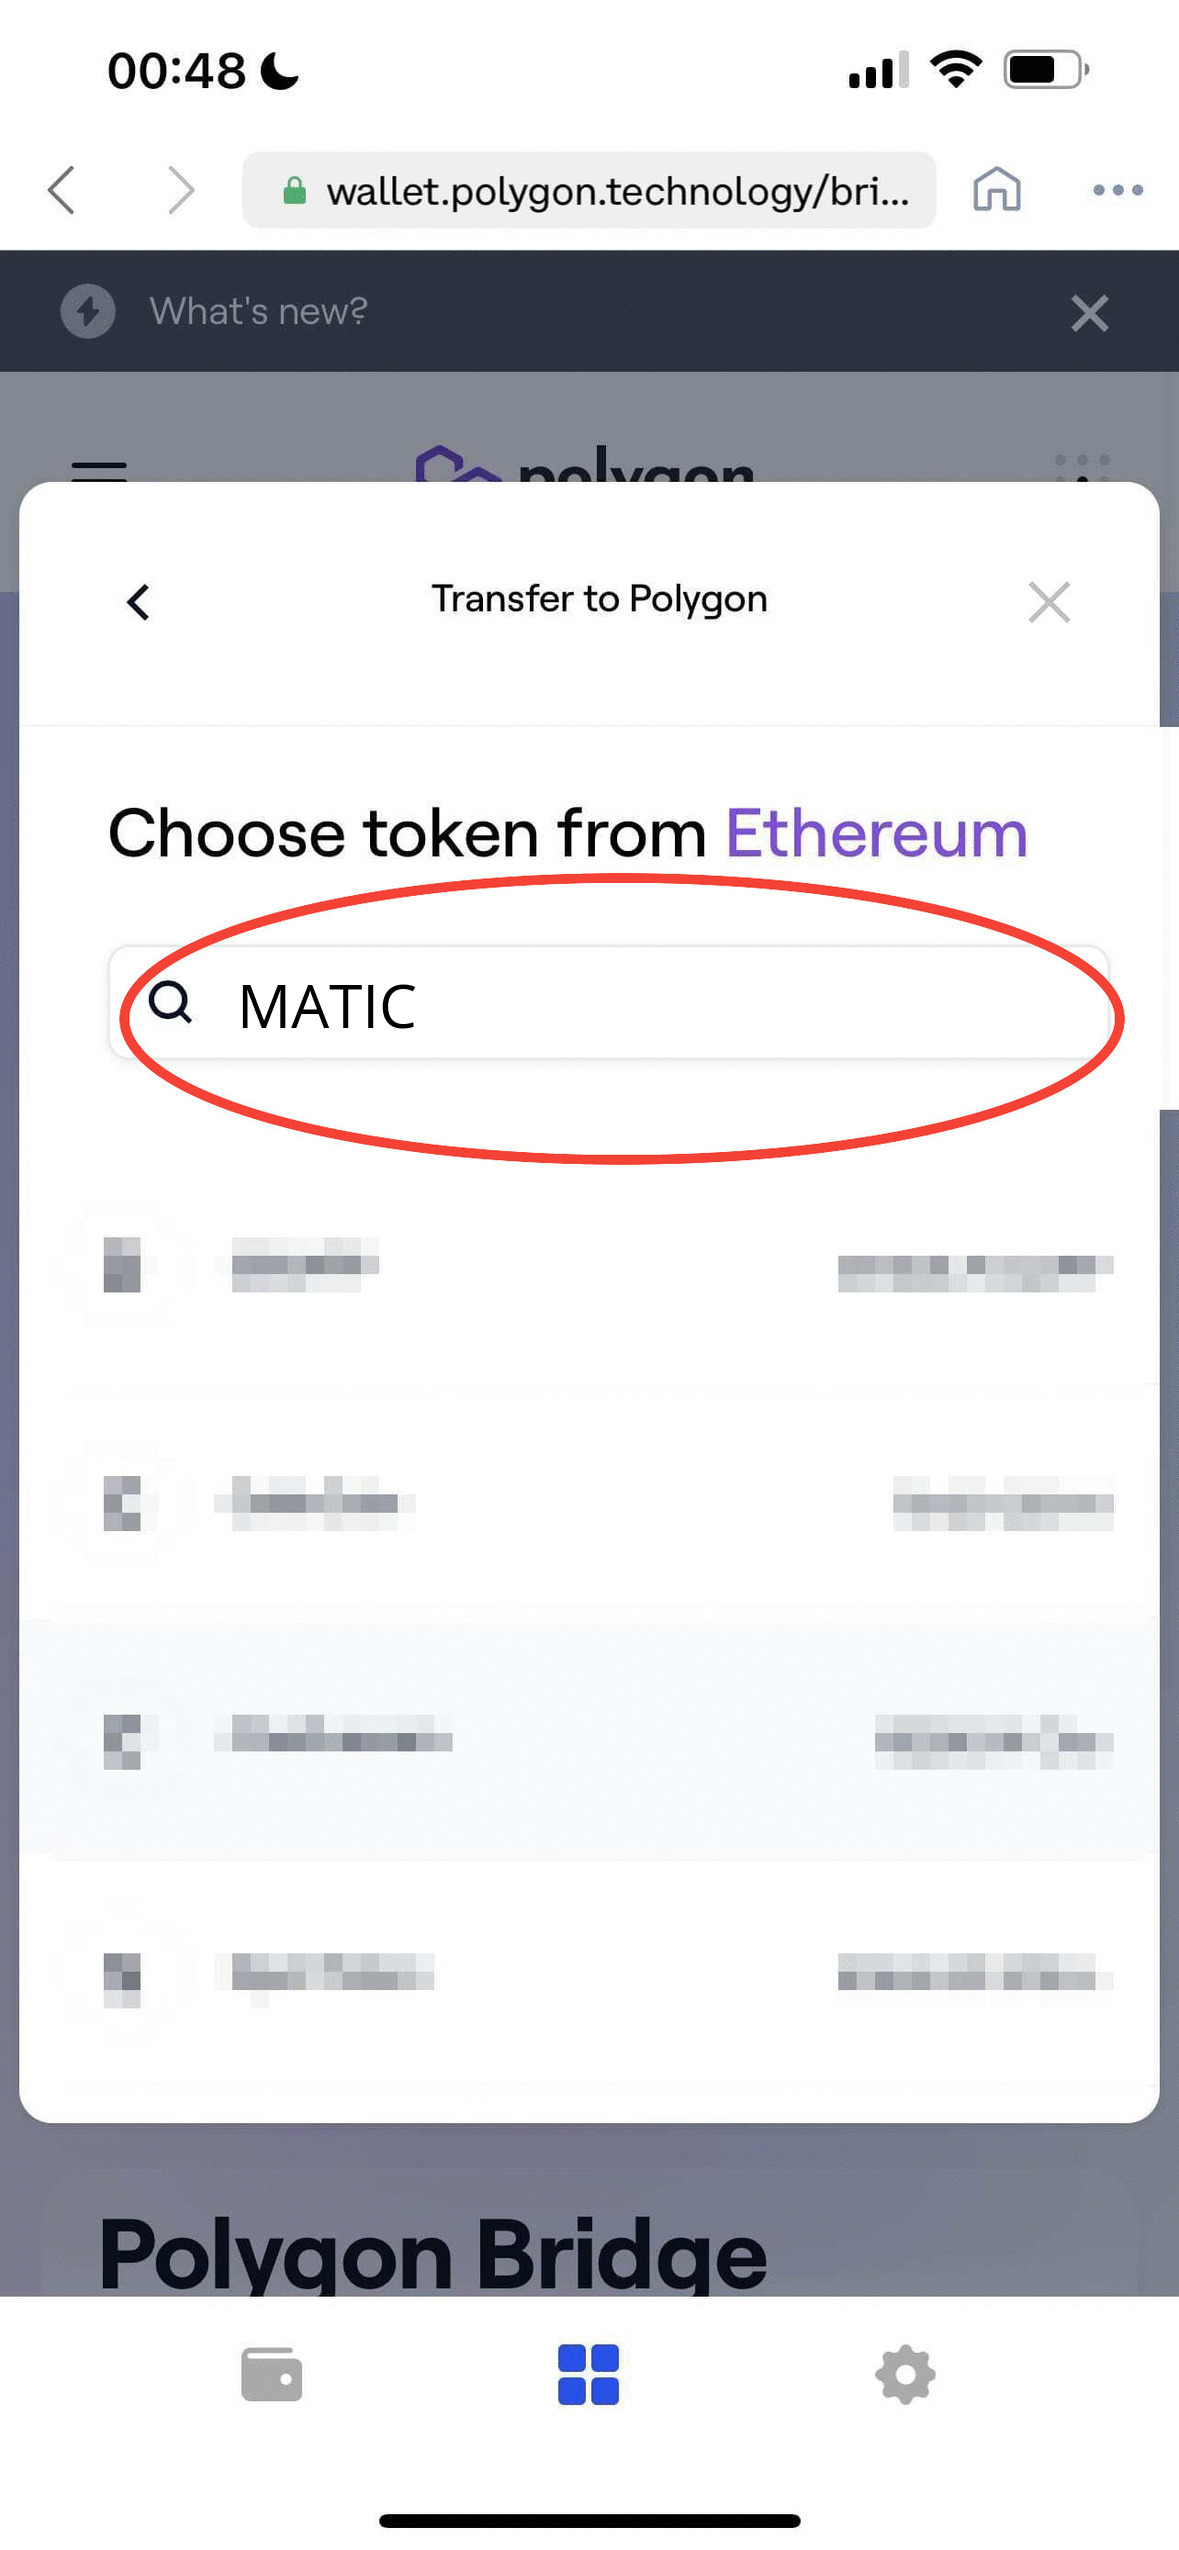
- Click on the "Ether" icon and change it to MATIC
- Click on transfer
- Confirm the transaction

Step 4: MINT!
- Before Minting, switch your wallet to the Matic Mainnet that we added in step 2.
- Mint directly from JasmyClubhouse.io with your MATIC
- For this, make sure your wallet is set to the Matic Mainnet
- After a successful mint, your NFT will become available for view in opensea.io
Any questions please message the admin of discord.gg/Jasmy and we are happy to help!